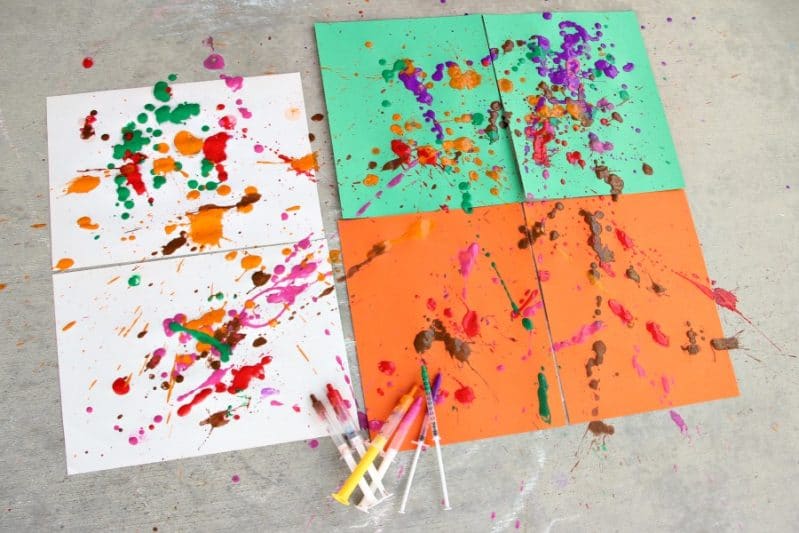
This simple syringe painting is a fun and easy way to create abstract art with your preschooler.
When I opened the cupboard to check our medicine expiration dates (since cold and flu season is upon us), I was pleasantly surprised to see how many syringes I had on-hand.
Have you ever noticed how many medicine syringes you accumulate when having young kiddos?
I say pleasantly surprised, because what may seem like an excess of just “stuff” to some, is actually a chance for us to upcycle and experiment with a new painting tool.
Begin by gathering your syringes (I recommend between four to six).
Grab your washable paint (affiliate link), choose your paper colors, get some painter’s tape (affiliate link).
And grab something to put the paint in (I used a 6 cupcake baking pan) or you could use an empty egg carton as well.
One note: I suggest adding a little water to each paint color and mixing with a spoon. This will make the paint more of a liquid and it will be easier to use in the syringes.
Once your paint and water are mixed together, it is time to add the syringes.
Helpful tip: this can be a messy activity, so doing this activity outside on a surface you can hose off would be best.
Also, paint flies far!!! So wear clothing that can get dirty and clear your painting surface.
So…your paper is taped down, your paint is in the containers, you added some water and mixed the paint, your syringes are ready, and you are all dressed accordingly.
That means you’re ready to take part in the art of syringe painting!
But first…
I recommend modeling for your kiddos how to hold and collect the paint in the syringes (try to use a different syringe for each color).
Then… practice a few squirts of the paint together as this activity is good practice for those fine motor skills.
Each syringe will work differently as some paint will only bubble out, some will squirt on one page, and some paint will fly.
Now that you have this beautiful abstract art, what can you do with it?
You can definitely display it in your home to add color and pizzazz to any window, wall, or fridge.
However, you can also take this awesome abstract art and create homemade place-mats with only two additional supplies.
- A pair of scissors
- Some clear contact paper (affiliate link)
Simply measure the contact paper to the size of your desired place-mat (I used two pieces of construction paper side-by-side).
Cut two pieces of the same-sized contact paper, then lay your art on the sticky side of one sheet of contact paper, and cover the top with the sticky side of the other sheet.
Smooth out any air pockets, trim any excess contact paper, and check that the edges are sealed.
Then, you have a homemade place-mat that can be for everyday use, for parties, or for holiday gatherings.
It is easy to keep clean, messes wipe right off, and your kiddo is sure to be happy with their creation!
How did you display your syringe painting artwork?
Simple Syringe Painting for Preschoolers on handsonaswegrow.com

No comments:
Post a Comment