Click here to read Coffee Dripped Book: Keepsake Craft for Kids on Hands On As We Grow
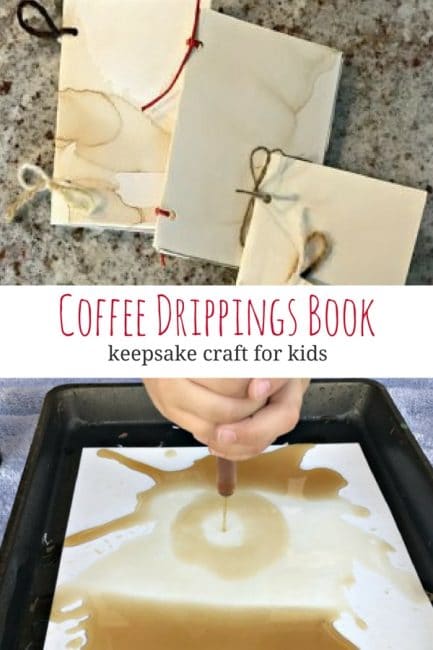
A coffee craft!! Yep, a fun and simple keepsake for your kids to enjoy creating using good ole’ decaf coffee.
This coffee dripped keepsake craft can be used for photo albums, drawing or writing books, secret messages, homemade gifts, treasure maps, and nature journals.
We love using ours as a nature journal, to collect favorite leaves that are found on nature walks, draw sketches of plants, or to smear some dirt for a texture page.
This coffee craft is a simple three-step process of coffee dripping, drying, and book assembly. Once created, it can be used right away or saved for a special activity or upcoming event.
Supplies needed:
- White 9×12 construction paper
- Decaf coffee (brewed)
- A cup
- A dropper (we love these twisty ones!) or a medicine syringe (affiliate link)
- A baking or craft tray
- A towel, sheet, or tablecloth
- A pair of scissors
- A hole punch
- Ribbon, yarn, or twine
- Cardstock or watercolor paper (optional, for cover)
But first… coffee!
Begin by brewing your cup of coffee so that it has time to cool before your kids use it for staining.
Then place your towel or sheet down on your crafting surface; whether that be on the patio, in the kitchen, or on the porch (coffee can stain).
Add your baking or crafting tray on the towel and put down a white piece of paper in the tray.
For the cover, I used a stronger white paper (watercolor paper – or you can use construction paper). It left a much more distinct coffee pattern on the paper, so it made a nice cover.
For the inside pages, I used regular construction paper, but you can also use construction paper for the entire book.
When your coffee is cooled, pour it into a non-breakable cup or container (like a plastic cup) and grab the dropper.
Now, grab the kids!
Making your coffee dripping book
Before beginning, I recommend having your kids wear clothing that can potentially get dirty or stained.
Then have your kids fill their droppers with the coffee and drop (squirt) it onto their white paper; this is great fine motor practice.
They may be hesitant at first and only do little drops or may choose to begin by making small spots.
But then, your kids may get really into it and make big designs or flood the paper with coffee. Either way works and will look cool!
The one thing about coffee dripping is that it doesn’t all absorb into the paper, so you will have excess coffee in the tray that can be used for staining the entire paper.
Also, when you pick up the paper, the coffee will run. It’s totally okay and adds to the design.
The goal is to have a design and the page fully stained.
Depending on how many pages you would like in the keepsake craft, will dictate the amount of paper to stain.
For example; we made one book with four pages and another book with eight pages (two sheets of construction paper and 1/2 sheet of watercolor paper).
As the pages are stained, simply remove them from the tray and place them somewhere to dry.
Keepsake Assembly:
Once the paper is dry, it’s time to assemble.
You’ll begin by folding the paper in half like a book, then cut apart.
This would be a great opportunity for cutting practice!
Then, fold the cut paper in half again to make a smaller book.
Combine all folded pages together and if you have a specific cover page, then place that on the outside.
It’s now time to hole punch the pages.
You’re going to make two holes on the folded part of each page.
Unfortunately, our hole punch could only be used with one page at a time, so we had to make holes in the cover first and then slide one page in at a time to line up the holes correctly.
If your hole punch can do all at the same time, then awesome.
Once your holes are made, simply put the pages back together and make sure the holes are lined up.
Then gather your string or ribbon, cut two pieces, and use them to tie the pages together.
Wallah! The pages of your kids’ coffee keepsake craft are ready to be filled.

No comments:
Post a Comment