Click here to read Shaving Cream Sensory Art Activity on Hands On As We Grow
Help your child explore their inner artist with this shaving cream sensory activity from Rachel!
Recently, I was unpacking yet another box and came across an art project that I did with my older two girls a few years ago. All I needed was shaving cream and food coloring.
This is one of my all-time favorite art activities!
I loved them so much that I actually framed them and hung them in the girls’ playroom over their art table. It was time to do this with Hannah!
Check out these other fun sensory ideas with shaving cream!
You can take this shaving cream sensory activity in a few directions, depending on what you and your child are up for.
It can be purely sensory play (incredibly messy or not-so-messy!), more focused color mixing and exploration or a creative art activity.
I love easily adaptable activities!
Prep the Shaving Cream Sensory Pan
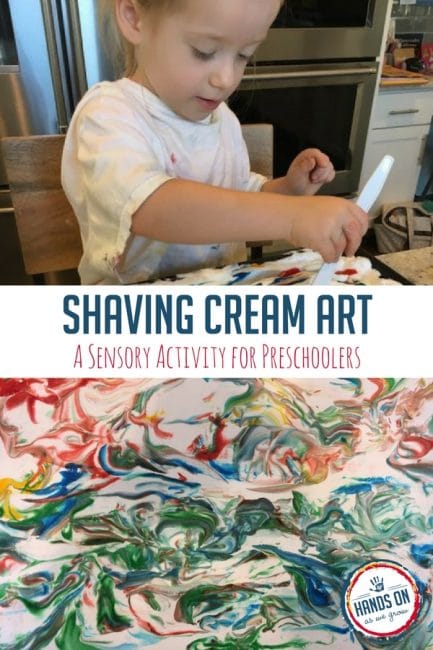
First, I filled a baking sheet with shaving cream.
Word to the wise, it’s more fun with a lot of shaving cream, so I always buy the cheapest can I can find.
Also, your house will probably smell like Barbasol for the rest of the day. I think it’s totally worth it!
Next, I gave Hannah the bottles of food coloring and showed her how to gently squeeze out a drop at a time. She dripped and dropped until she decided it was ready.
When she was done with that, she started swirling.
She started with a toothpick to experiment with some color mixing. I gave her a plastic knife when she was ready to do the major swirling.
This is one of the spots where you can change up the activity.
If you are purely in it for the squishy, colorful mess, then, by all means, go for it!
Add tools to avoid some of the mess or just let them dig in with their hands! Let them swirl and play their hearts out.
If you want to make the marble art, you will need to guide the swirling a little. At a certain point, the pretty streaks and swirls turn a not-so-pretty brown.
I just had Hannah stop every so often and asked if she was ready to stamp. She LOVES stamps so I knew this would help her stop.
Firmly but gently press a piece of white cardstock evenly across the surface (cardstock really does work best at holding up to the moisture and not letting the colors bleed).
Lift it up and use a straight edge (I used a ruler) to scrape all of the shaving cream off. You will be left with the swirls of food coloring stamped to the paper!
After making her picture, Hannah was ready to play some more. She still didn’t want to put her hands in the shaving cream so I gave her more toothpicks and a plastic fork.
She could have added food coloring and mixed it up for the rest of the day!
Would your child stick to the tools or go elbow deep in shaving cream?
Check out this shaving cream art activity for even more fun!


