Click here to read Super Simple Valentine’s Day Cards Any Kid Can Make on Hands On As We Grow
This Valentine’s Day activity for kids from Hands On As We Grow contributor Rachel is so easy and fun, kids of any age can do it!
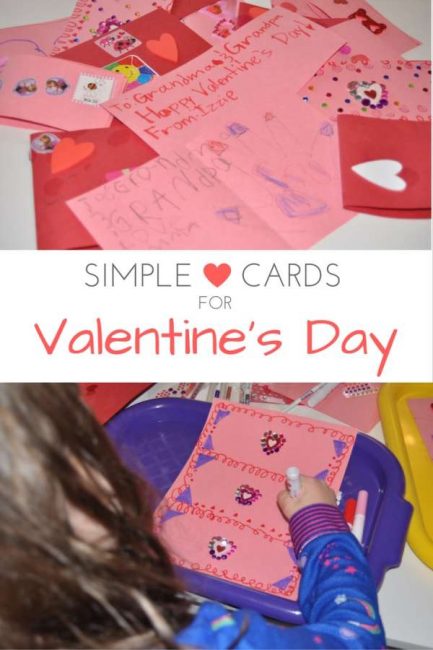
Even the youngest or least crafty kids will be smiling making these simple Valentine’s Day cards. They make sweet keepsakes for family and friends.
Making Valentine’s Day cards is also a great way to teach your kids about thoughtfulness.
What makes these cards unique – and so simple! – is that instead of making individual cards, they decorated full sheets of paper that I cut into cards.
My older two girls can get very hung up on making the perfect card, but this was so much easier!
This method of card-making is easily adaptable to any holiday or occasion.

My kids LOVE making cards. It makes them so happy to create something beautiful to share with the people they love.
Mama likes it because it saves a ton of money on greeting cards!
I love the flexibility of this activity. You can use practically any supplies you’ve got on hand, or grab one or two special items to pump up the love theme.
We made our simple Valentine’s Day cards with:
- red and pink construction paper
- markers
- colored pencils
- dot markers (affiliate link)
- stamp markers (affiliate link)
- Valentine’s stickers
- adhesive gems
- heart stamps (affiliate link)

They decorated their papers however they wanted. I did tell them not to write anything or draw pictures because I would be cutting the paper.
It was so interesting to see the different ways they approached these simple Valentine’s Day cards!

When they finished, I cut each paper into two or three pieces (if you have an older child, this is a great opportunity for cutting practice). Then it was time to sign their cards!
Izzie was excited to practice writing on her cards, then she helped her sister with spelling.
I traced my youngest’s hand on one side, then drew a heart and wrote her name on the other side.

I know some grandparents that are going to be very excited to get these cards in the mail!
Here are some other fun ways for little ones to learn their names!