

Click here to read Snowman Craft from Tin Cans! Great Winter Craft! on Hands On As We Grow
Recycle tin cans with this snowman craft that is perfect for winter.
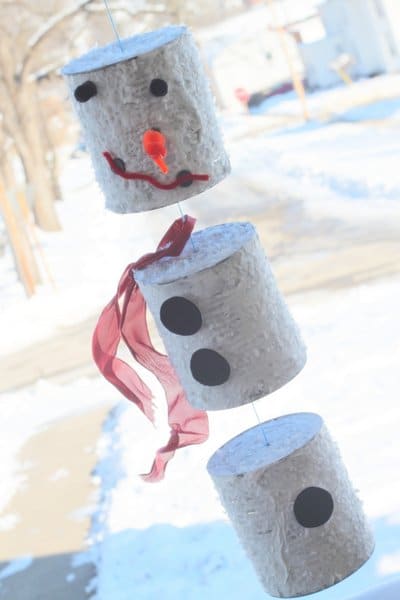
This snowman craft (that’s also a wind chime) was so fun. I’ve had this idea in my head the entire fall and couldn’t wait to find the time to do it with the boys!
Things started rocky, for sure, but I do love the end result.
It started out that I didn’t have any white paint. Well, honestly, I did. Just not very much. I had a small jar of it from the washable paints that the boys used.
But we needed enough to cover 3 giant tin cans (coffee can size!).
Find more snowman crafts for kids here.
I asked my fellow craft friends for ideas to use for white paint. I’ve made homemade paint before. But honestly, white threw me for a loop.
Our solution was the good ol’ shaving cream and glue mixture. It’s puffy paint and it gave the tin cans the perfect effect for a snowman!
George covered a tin can with the paint mixture using a sponge. I painted the others myself. Henry was just too busy at the time to help, or so he said…
With the paint still wet, George sprinkled on a lot of Frosty Snow flakes (affiliate link). I had a lot of this on hand, so that’s what I chose to use. White glitter would look awesome too.

While everything was still wet, we put on the snowman parts.
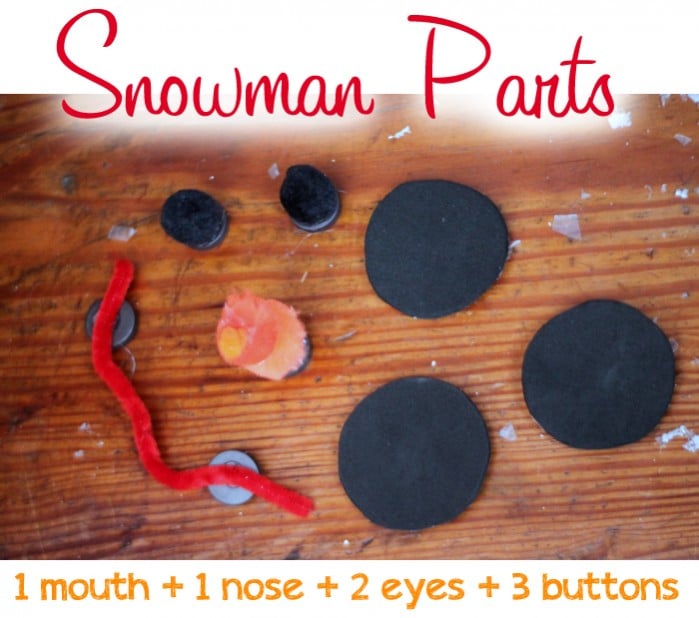
I pulled together 2 eyes, a nose, a mouth, and three buttons from the idea from our interactive snowman fridge. I made them all magnetic by hot gluing it onto magnetic buttons (affiliate link).
The eyes are made from black pom poms.
The nose is 2 orange pom poms and a small piece of a pipe cleaner (though I now think it should just be 3 pom poms, with the last one being a smaller one).
The mouth is a red pipe cleaner (magnets on each end).
The 3 buttons are black foam pieces cut into circles.
Red ribbon was also used as a scarf.
I tied the three tin cans together with yarn and washers.
This was actually trickier than I thought. Its easier to start at the bottom of the snowman and work your way to the top.
Tie a washer one, thread through a hole at the top of the tin can [made using a nail, be careful of sharp edges]. Figure out the distance to the top of the next can with some spacing in between and tie another washer. And so on.
(Note: I didn’t add additional nuts and washers this time to make this a true wind chime. If you’d like to, just add more washers along the yarn when you’re stringing it through. It’ll clang against the side of the tin cans.)
Then hang it somewhere low enough that the kids can decorate it!
A snowman made using marshmallows is an easy beginner hands on activity!
I just simply tied the ribbon around the yarn loosely for the scarf. The rest Henry did!

I took our snowman craft outside and hung it on the porch.
(The Frosty Snow flakes (affiliate link) fall off every time you bump it, so if you’d like to keep it inside, maybe don’t use them).
The boys wanted to be able to see their snowman from the windows, so I had to make sure it was strategically placed!
No comments:
Post a Comment