www.anycard.games
Friday, March 30, 2018
Tuesday, March 27, 2018
Matching Upper and Lowercase Letters on ABC Road
Click here to read Matching Upper and Lowercase Letters on ABC Road on Hands On As We Grow
Help your child learn their ABCs by matching upper and lowercase letters.
I’ve found that matching upper and lowercase letters is a great way to reinforce learning letters for preschoolers. Of course, making it fun is really what works!
We did just that using our ABC mat (affiliate link if you’re interested). A toy I completely forgot about.
Do you ever forget you have certain toys? You put them away, thinking you’ll rotate them in or something, but then never do?
Our ABC mat is one of those toys. It’s one I don’t want out all the time because the boys just get all the pieces out and they’re strewn about the house for days and days.
So I put it away, back in the closet, so they wouldn’t see it and drag it out.
I forgot what a great learning tool it could be though! I forgot about it altogether.
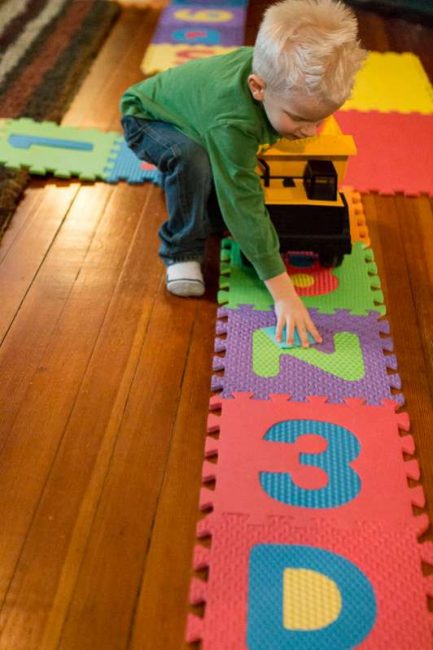
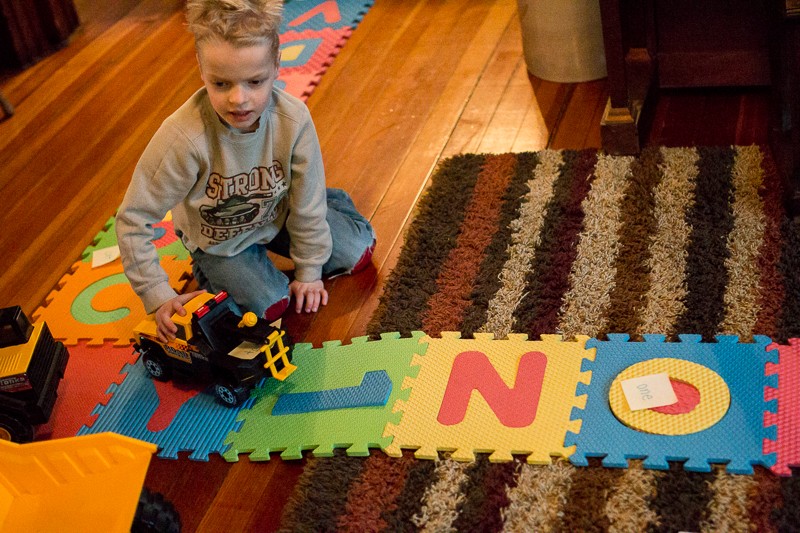
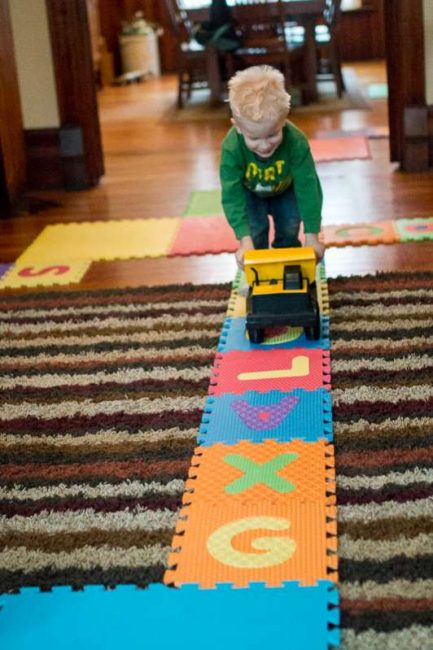
When the boys were outside sledding with Dad, I snuck it out and set up an ABC road to work on matching upper and lowercase letters.
Find more Move & Learn Activities like this!
George came in first, which was perfect! This letter learning activity was perfect for him to practice lowercase letters.
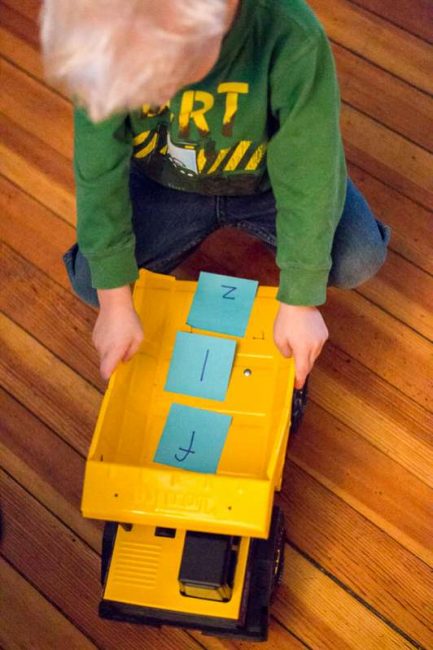
As I wrote lowercase letters of the alphabet on sticky notes, George found his vehicle of choice, a dump truck.
I “loaded” his dump truck with 3 or 4 lowercase letters at a time.
As I loaded it, I asked George what the letters were. We’re still working on many of the lowercase letters. If he needed help, this is when I’d tell him what they were.
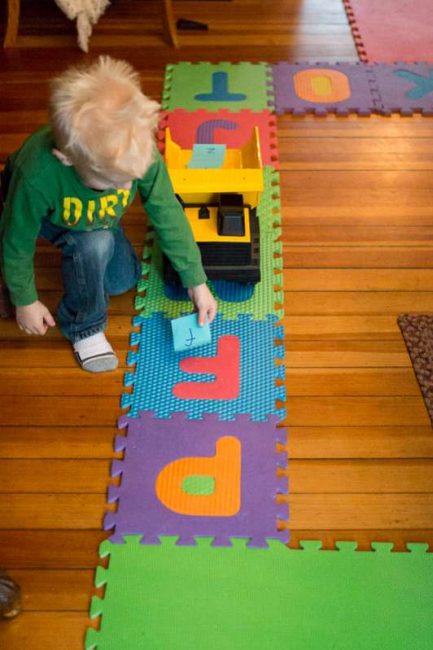
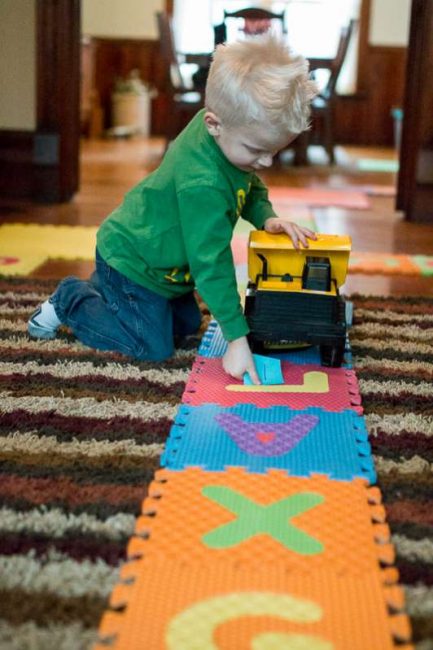
Then he was off to find the matching uppercase letter on the ABC road and stick the lowercase letter to it.
The goal was to fill all the ABC road with its matching lowercase counterparts.
I purposefully didn’t make the road go around our loop in the house. I didn’t want it to get out of control as my kids often do.
It was time for me to start preparing dinner, so I set the road up so it didn’t go through the kitchen or by the dining room table.
After George found the three matching letters, he’d come back to me to give him another load of letters.
There was some confusion at times. For instance, when matching the upper and lowercase letters like L – the lowercase is ‘l’ which looks like the uppercase ‘I’, so I had to clarify. Same with the M and W. No biggie.
Then Henry joined us and immediately wanted to do the activity too!
Well, Henry’s in first grade and matching upper and lowercase letters is a little behind him.
I kicked it up a notch and used words.
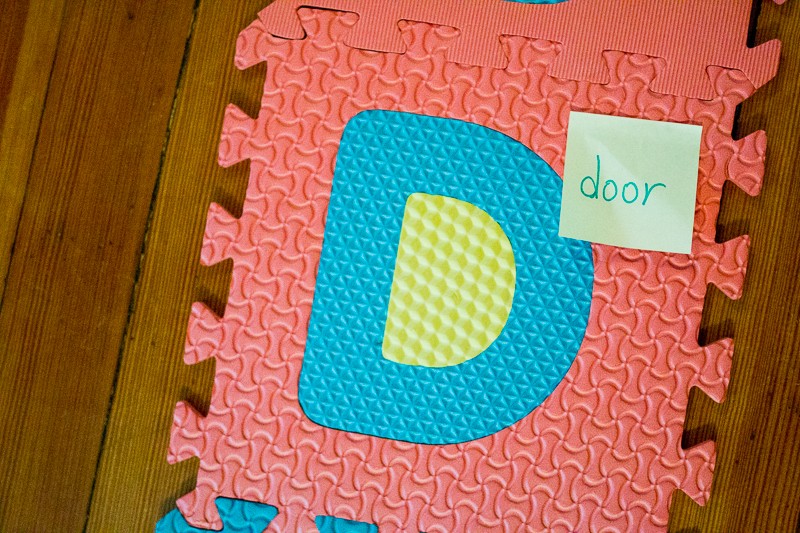
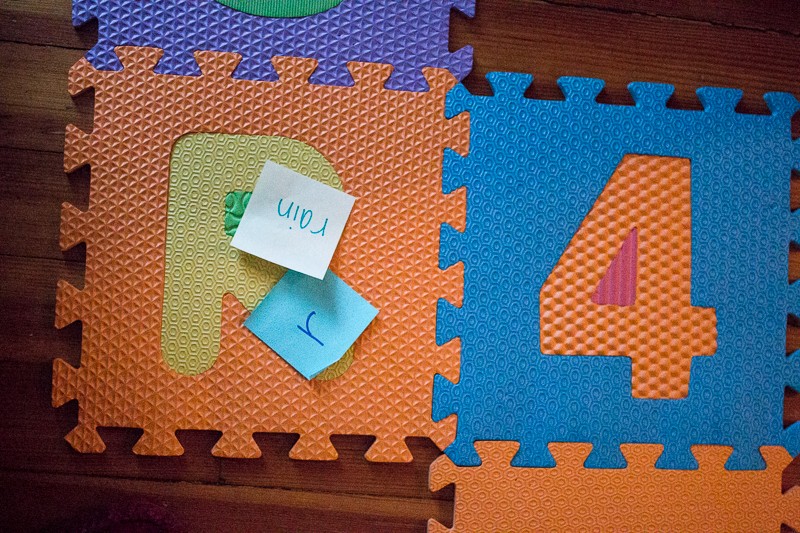
I wrote a word on the sticky note that began with each letter.
Still not the toughest of tasks for him. But he did have to read the word to me before finding what letter it goes on.
I wish I could have come up with harder words for him.
I just didn’t take a lot of time to plan that part out.
The boys were done with their learning after they got through their letters.
They then raced their trucks around the road until it was time for dinner.
If they had wanted to continue, I had numbers ready for George as well.
And Henry would have had subtraction problems to equal each number 0-9.
We’ve been working on matching upper and lowercase letters a lot (and for quite a while!):
Matching Upper and Lowercase Letters on ABC Road

Click here to read Matching Upper and Lowercase Letters on ABC Road on Hands On As We Grow
Help your child learn their ABCs by matching upper and lowercase letters.
I’ve found that matching upper and lowercase letters is a great way to reinforce learning letters for preschoolers. Of course, making it fun is really what works!
We did just that using our ABC mat (affiliate link if you’re interested). A toy I completely forgot about.
Do you ever forget you have certain toys? You put them away, thinking you’ll rotate them in or something, but then never do?
Our ABC mat is one of those toys. It’s one I don’t want out all the time because the boys just get all the pieces out and they’re strewn about the house for days and days.
So I put it away, back in the closet, so they wouldn’t see it and drag it out.
I forgot what a great learning tool it could be though! I forgot about it altogether.
When the boys were outside sledding with Dad, I snuck it out and set up an ABC road to work on matching upper and lowercase letters.
Find more Move & Learn Activities like this!
George came in first, which was perfect! This letter learning activity was perfect for him to practice lowercase letters.
As I wrote lowercase letters of the alphabet on sticky notes, George found his vehicle of choice, a dump truck.
I “loaded” his dump truck with 3 or 4 lowercase letters at a time.
As I loaded it, I asked George what the letters were. We’re still working on many of the lowercase letters. If he needed help, this is when I’d tell him what they were.
Then he was off to find the matching uppercase letter on the ABC road and stick the lowercase letter to it.
The goal was to fill all the ABC road with its matching lowercase counterparts.
I purposefully didn’t make the road go around our loop in the house. I didn’t want it to get out of control as my kids often do.
It was time for me to start preparing dinner, so I set the road up so it didn’t go through the kitchen or by the dining room table.
After George found the three matching letters, he’d come back to me to give him another load of letters.
There was some confusion at times. For instance, when matching the upper and lowercase letters like L – the lowercase is ‘l’ which looks like the uppercase ‘I’, so I had to clarify. Same with the M and W. No biggie.
Then Henry joined us and immediately wanted to do the activity too!
Well, Henry’s in first grade and matching upper and lowercase letters is a little behind him.
I kicked it up a notch and used words.
I wrote a word on the sticky note that began with each letter.
Still not the toughest of tasks for him. But he did have to read the word to me before finding what letter it goes on.
I wish I could have come up with harder words for him.
I just didn’t take a lot of time to plan that part out.
The boys were done with their learning after they got through their letters.
They then raced their trucks around the road until it was time for dinner.
If they had wanted to continue, I had numbers ready for George as well.
And Henry would have had subtraction problems to equal each number 0-9.
We’ve been working on matching upper and lowercase letters a lot (and for quite a while!):
Monday, March 26, 2018
Spring Flower Pretend Play
Click here to read Spring Flower Pretend Play on Hands On As We Grow
Bring a pop of spring color into your home with a fun spring flower pretend play activity from Rachel!
I don’t know where you live, but here on the East Coast, we really need a dose of spring right about now.
Even a dose of fake spring will do!
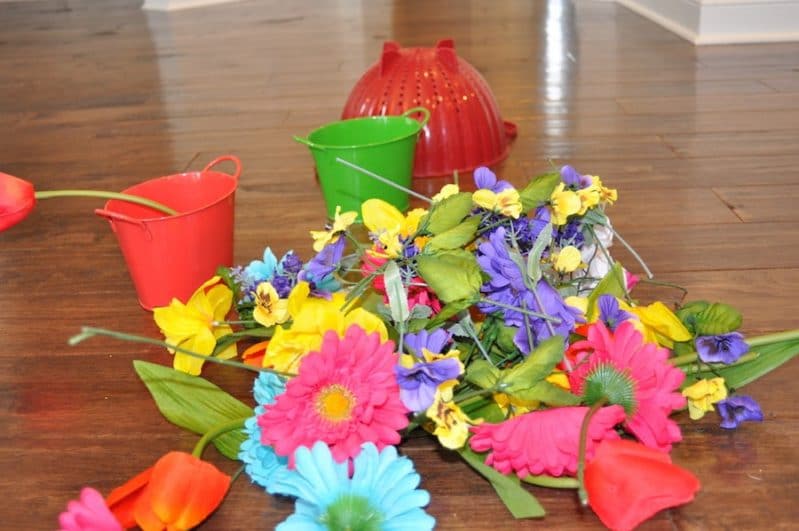
So I brought out our stash of fake flowers for some bright and colorful pretend play.
Welcome Spring with fun seasonal activity ideas!
I picked these flowers up from a craft store at the end of the season several years ago when they were on clearance.
Most of them came in bunches, so I used wire cutters to clip them into individual flowers.
If you go this route, make sure to double-check the cut ends for any pointy or sharp spots. Mine didn’t have any, but I’m sure it could happen.
Imaginative Spring Flower Pretend Play
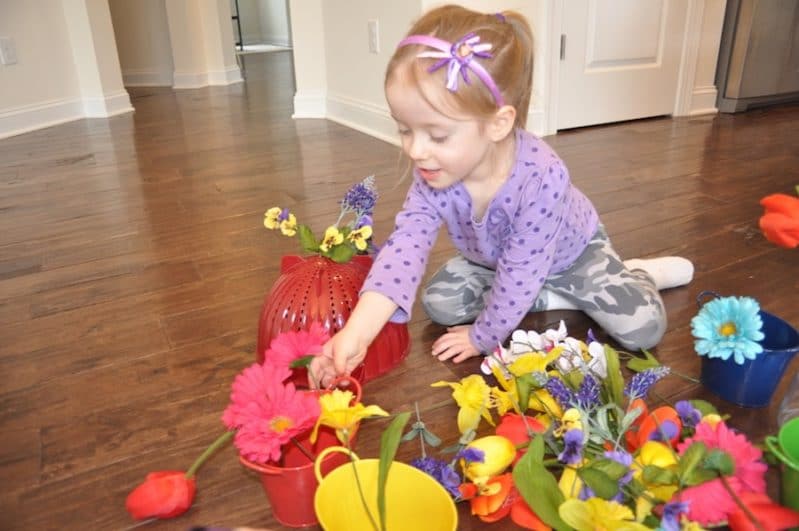
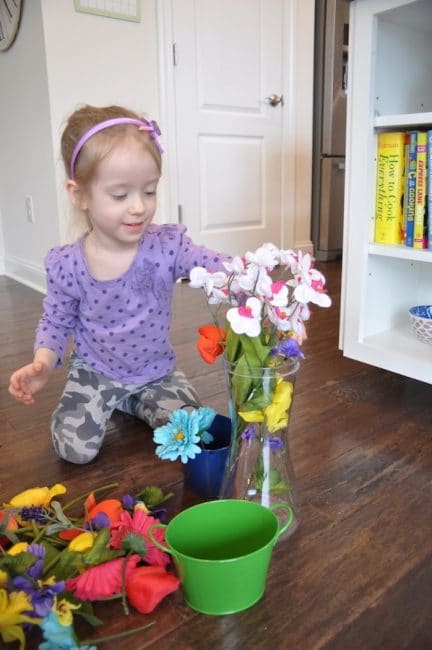
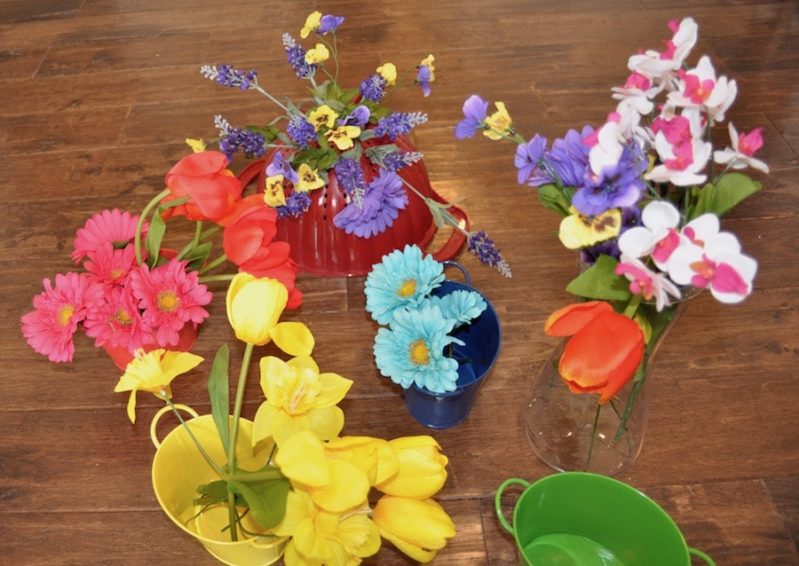
I put out a few containers of the flowers for Hannah. We found the different colored buckets came from the dollar store.
I also gave her a colander and a tall plastic pitcher.
I thought about putting out a few real glass vases but decided against it. If you have older kids or are playing on a carpeted surface, using real vases will definitely add to the pretend play element.
My intention with this activity was just to play.
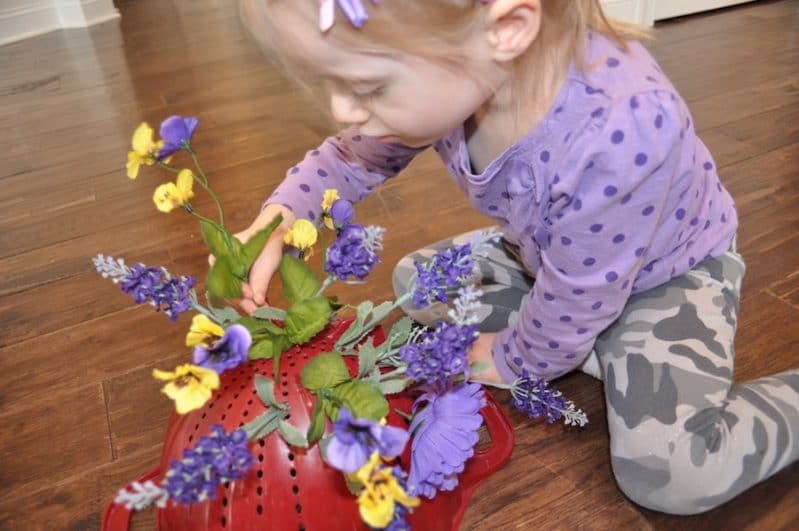
I added the colander for some bonus fine motor work because some of the stems are small enough for the colander holes.
Mostly though, the idea was pretend play. Pretend to arrange the flowers in the different containers, pretend to pick the flowers and smell them, that sort of thing.
This is why I generally don’t say much when I put out an activity. I want to see where their minds go.
Hannah turned it into a color and size sorting activity. The small flowers with stems that fit in the colander holes went there. She put the others into the red, yellow and blue buckets.
The leftovers went into the plastic pitcher, along with a few extras because she decided it looked too empty.
The flowers and colors definitely brightened our day!
Hannah played for a long time when we first did it, then asked to do more spring flower pretend play after her nap! Interestingly, the second time she played totally differently than the first.
The second time around, she turned the colander right side up, stood a few steps away and tried to throw all the flowers into the colander.
Once she got them all in, she either dumped them on her head or spread them around the room. Then she collected them and started tossing again!
Both ways were fun and any activity they want to go back to is a win in my book!
How do you encourage pretend play with your children?
Spring Flower Pretend Play

Click here to read Spring Flower Pretend Play on Hands On As We Grow
Bring a pop of spring color into your home with a fun spring flower pretend play activity from Rachel!
I don’t know where you live, but here on the East Coast, we really need a dose of spring right about now.
Even a dose of fake spring will do!
So I brought out our stash of fake flowers for some bright and colorful pretend play.
Welcome Spring with fun seasonal activity ideas!
I picked these flowers up from a craft store at the end of the season several years ago when they were on clearance.
Most of them came in bunches, so I used wire cutters to clip them into individual flowers.
If you go this route, make sure to double-check the cut ends for any pointy or sharp spots. Mine didn’t have any, but I’m sure it could happen.
Imaginative Spring Flower Pretend Play
I put out a few containers of the flowers for Hannah. We found the different colored buckets came from the dollar store.
I also gave her a colander and a tall plastic pitcher.
I thought about putting out a few real glass vases but decided against it. If you have older kids or are playing on a carpeted surface, using real vases will definitely add to the pretend play element.
My intention with this activity was just to play.
I added the colander for some bonus fine motor work because some of the stems are small enough for the colander holes.
Mostly though, the idea was pretend play. Pretend to arrange the flowers in the different containers, pretend to pick the flowers and smell them, that sort of thing.
This is why I generally don’t say much when I put out an activity. I want to see where their minds go.
Hannah turned it into a color and size sorting activity. The small flowers with stems that fit in the colander holes went there. She put the others into the red, yellow and blue buckets.
The leftovers went into the plastic pitcher, along with a few extras because she decided it looked too empty.
The flowers and colors definitely brightened our day!
Hannah played for a long time when we first did it, then asked to do more spring flower pretend play after her nap! Interestingly, the second time she played totally differently than the first.
The second time around, she turned the colander right side up, stood a few steps away and tried to throw all the flowers into the colander.
Once she got them all in, she either dumped them on her head or spread them around the room. Then she collected them and started tossing again!
Both ways were fun and any activity they want to go back to is a win in my book!
How do you encourage pretend play with your children?
Sunday, March 25, 2018
Easy Pipe Cleaner Ring Stacking Activity with a Twist
Click here to read Easy Pipe Cleaner Ring Stacking Activity with a Twist on Hands On As We Grow
Switch up a popular ring stacking activity with pipe cleaners so that it’s fun for littler ones, too.
There are so many fun activities out there for children, especially on Hands on As We Grow. Preschoolers and toddlers can have a blast!
For littler children, especially babies and early walkers, finding easy-to-do activities can be harder.
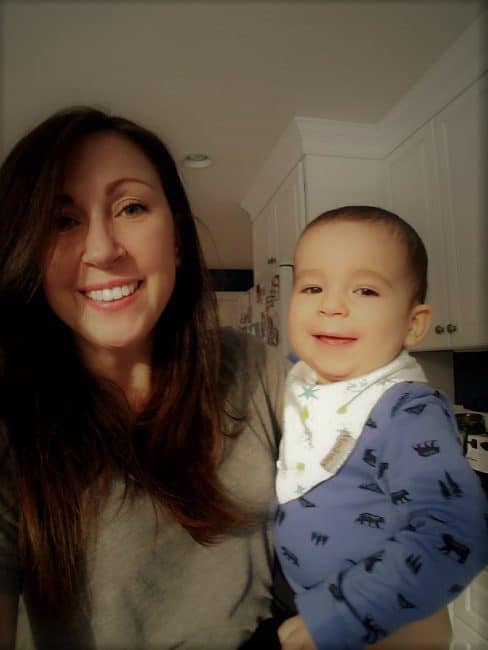
Our Member of the Month, Andrea, loves The Activity Room because it has helped her to find fun crafts and activities for her baby.
She’s also found a supportive community of other parents here.
“The Activity Room is great because not only can you share what you are doing, you can see what others are doing and get even more great ideas,” said Andrea. “Plus everyone is really friendly and supportive.”
Filling your time with activities helps your young child to build skills and make each day interesting.
Let’s Meet Andrea
How many kids do you have and how old are they?
One child who is 17 months
How long have you been in The Activity Room?
3 months
What is your favorite activity you’ve done in The Activity Room?
Stacking solo cups and knocking them down
What’s your favorite thing to do with your kids when you get a few moments?
Play outside
What’s your best tip for doing activities with your kids?
Just let it happen however it happens and don’t worry about how it is supposed to go or how something is supposed to look
If you were to tell a friend about The Activity Room, what would you say to them?
The Activity Room has given me so many ideas for activities to do with my son that are simple and I never would have thought of on my own. They help break up the day and add something interesting into the day.
Share your favorite quote
I may not have it together every day, but everyday we are together and that’s all that matters.
Pipe Cleaner Ring Stacking Activity:
Having a child on the younger side requires modification.
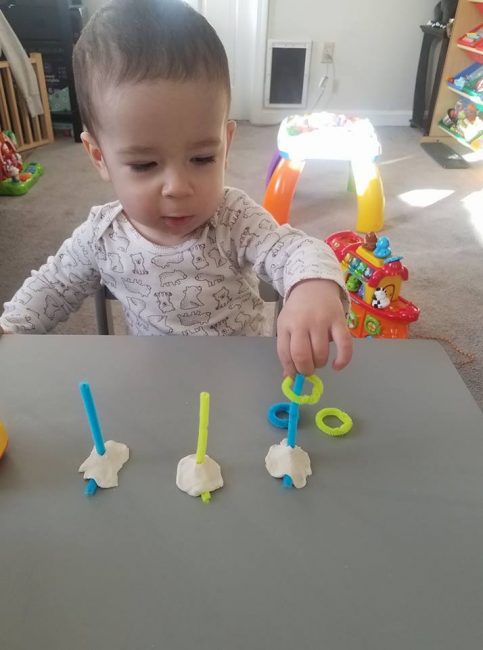
Instead of putting pasta or cereal on sticks, I used pipe cleaners to make easier rings to place on pipe cleaner sticks.
Younger toddlers will love this easy ring stacking activity!
How has The Activity Room helped you to switch up activities for your baby?
Easy Pipe Cleaner Ring Stacking Activity with a Twist

Click here to read Easy Pipe Cleaner Ring Stacking Activity with a Twist on Hands On As We Grow
Switch up a popular ring stacking activity with pipe cleaners so that it’s fun for littler ones, too.
There are so many fun activities out there for children, especially on Hands on As We Grow. Preschoolers and toddlers can have a blast!
For littler children, especially babies and early walkers, finding easy-to-do activities can be harder.
Our Member of the Month, Andrea, loves The Activity Room because it has helped her to find fun crafts and activities for her baby.
She’s also found a supportive community of other parents here.
“The Activity Room is great because not only can you share what you are doing, you can see what others are doing and get even more great ideas,” said Andrea. “Plus everyone is really friendly and supportive.”
Filling your time with activities helps your young child to build skills and make each day interesting.
Let’s Meet Andrea
How many kids do you have and how old are they?
One child who is 17 months
How long have you been in The Activity Room?
3 months
What is your favorite activity you’ve done in The Activity Room?
Stacking solo cups and knocking them down
What’s your favorite thing to do with your kids when you get a few moments?
Play outside
What’s your best tip for doing activities with your kids?
Just let it happen however it happens and don’t worry about how it is supposed to go or how something is supposed to look
If you were to tell a friend about The Activity Room, what would you say to them?
The Activity Room has given me so many ideas for activities to do with my son that are simple and I never would have thought of on my own. They help break up the day and add something interesting into the day.
Share your favorite quote
I may not have it together every day, but everyday we are together and that’s all that matters.
Pipe Cleaner Ring Stacking Activity:
Having a child on the younger side requires modification.
Instead of putting pasta or cereal on sticks, I used pipe cleaners to make easier rings to place on pipe cleaner sticks.
Younger toddlers will love this easy ring stacking activity!
How has The Activity Room helped you to switch up activities for your baby?
Thursday, March 22, 2018
Wednesday, March 21, 2018
Marbled Easter Eggs Sensory Activity
Click here to read Marbled Easter Eggs Sensory Activity on Hands On As We Grow
Making these marbled Easter eggs definitely doubles as a fun sensory activity!
Finding ways for young kids (under 4-ish) to decorate Easter eggs can be tricky sometimes. They don’t have the patience to sit and hold an egg in a cup to make it two colors.
Or the ability to really do the fancy decorative eggs either.
Make marbled Easter eggs that little kids as young as 2 can do!

It’s a super fun process!
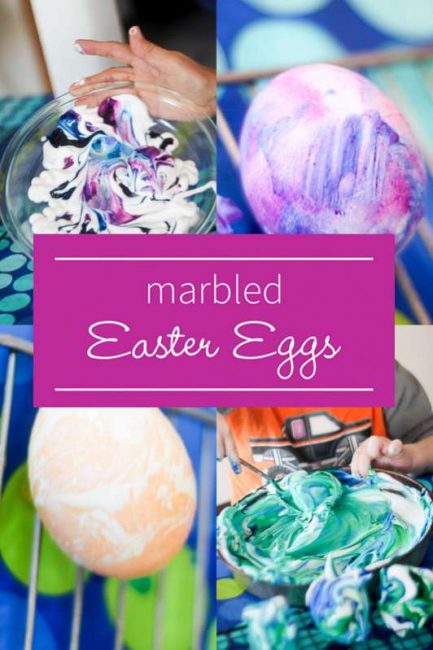
All you’ll need to decorate these eggs is a tray of shaving cream and some food coloring! That’s it!
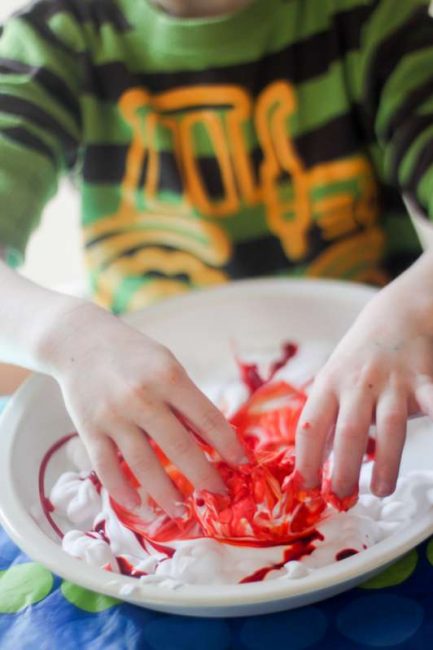
Fill a tray or a pie plate with shaving cream.
Drop in several drops of two different colors of food coloring. Gel coloring works great.
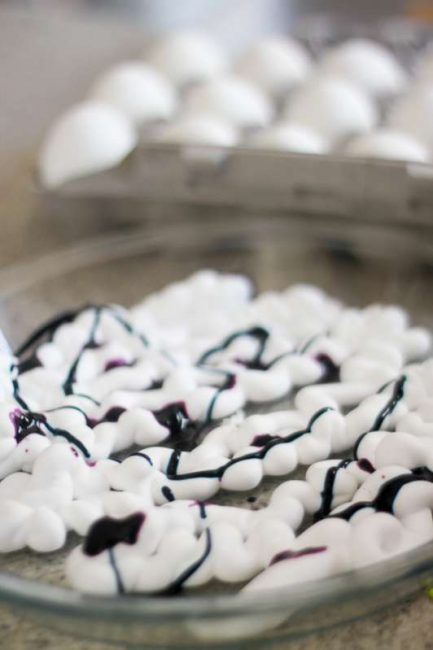
Gently drop hard-boiled eggs, one at a time, into the shaving cream mix and roll it around.
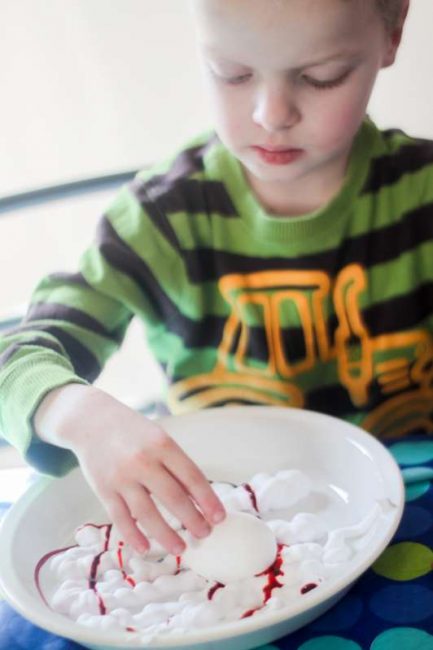
One way to roll the egg around is by tipping the plate back and forth. This can be a bit tricky for little hands to do.
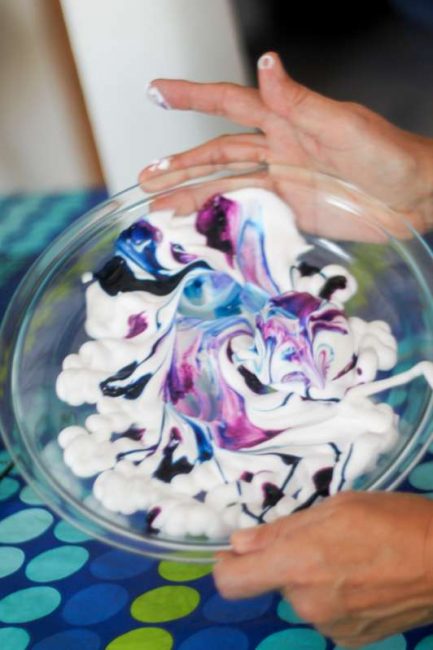
Or use a spoon or your hands to physically move it, which leads to amazing sensory fun for the kids that they’ll love!
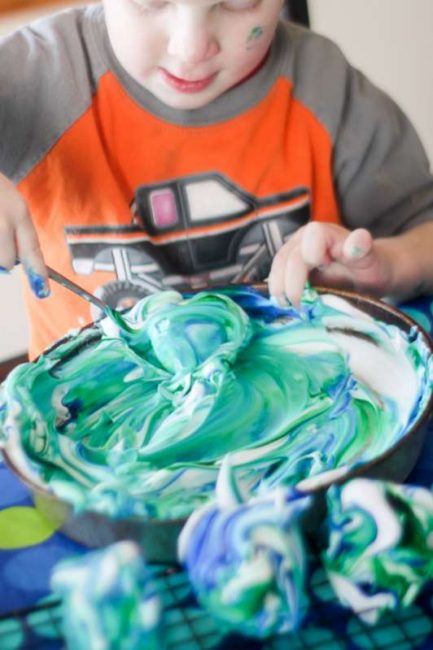
Be sure to cover the eggs completely with food coloring. Let them play and decorate each Easter egg as long as they like!
Take them out, covered in shaving cream and let them sit for a bit.
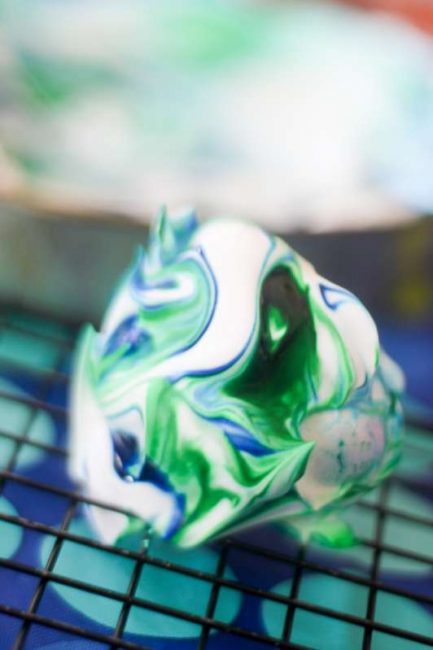
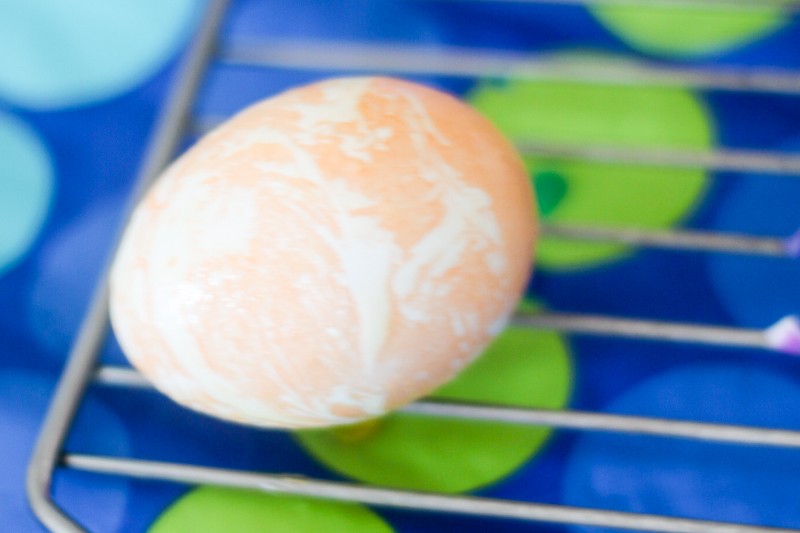
Then wipe the shaving cream off the egg to leave a really cool marble effect.
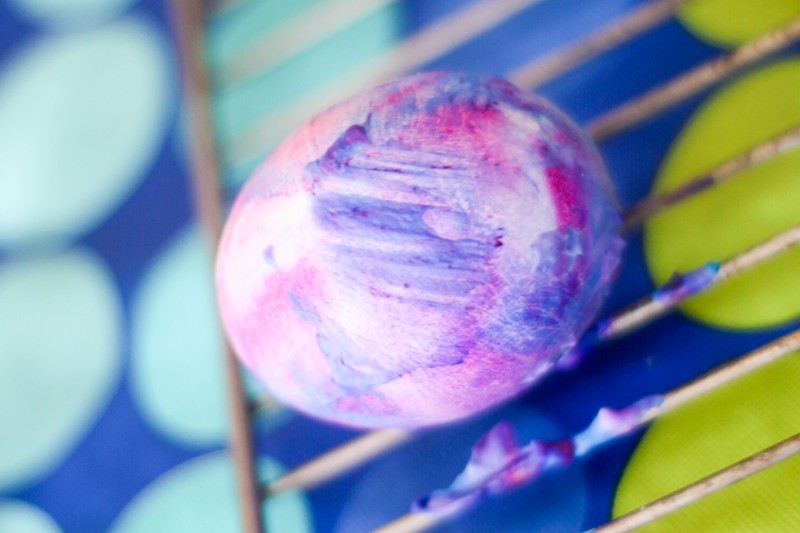
Want more ways to decorate your Easter eggs this year? Try one of these 26!

