www.anycard.games

Sponsored by: www.anycard.games No In-built rules. Play any card games just like holding cards in your hand with upto 10 players online!! Free to join and free joining in-game cash Bonus for limited time!!


Tuesday, April 3, 2018

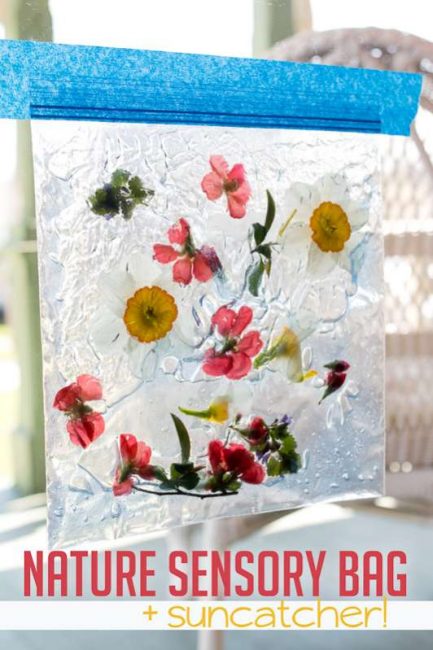
Nature Sensory Bag Suncatcher


Hands On As We Grow https://ift.tt/2q2a1jj

Click here to read Nature Sensory Bag Suncatcher on Hands On As We Grow


Explore spring, and build a fun suncatcher, when you make a DIY nature sensory bag with your kids!

I love making simple sensory bags for the kids, this nature sensory bag is no exception. They’re easy to make, super fast, and gives the kids something to explore in a fun way. I find them super entertaining for toddlers.

We’ve recently done learning sensory bags for the older boys, making them ‘I Spy’ sensory bags to find letters and math equations (for my first grader).

But my favorite one we’ve done in the past was so simple, just some googly eyes to explore. (It was during the Halloween season).

We needed to explore something for other seasons, right?

This is perfect for Spring with all the little bits of nature peeking up now.

A No-Mess Way for Toddlers to Explore Nature

Here are 48 ways to explore with sensory bags!

Make Your Own DIY Nature Sensory Bag

The boys did their part to help me make this nature sensory bag.

They went outside to collect flowers and leaves (make it a scavenger hunt!) to add to the sensory bag while I added hair gel to a gallon-size baggy.

I buy the cheapest hair gel I can possibly find (affiliate link, this was L.A. Looks which brought back funny memories). This gel was blue in the bottle and I didn’t have a lot left, maybe half a bottle, but it was enough! I love that it didn’t end up looking too blue either.

It took them awhile because we don’t have many flowers yet in our yard, so they had to head to Grandpa’s yard to find gorgeous flowers (he gave them the okay to pick them).

Once the boys got back with their nature finds, I added them to the bag of gel.

I decided on a front side of the sensory bag and tried my best to lay the flowers flat facing that side.

I didn’t double bag it, but you could if you’re worried about holes or it leaking.

Nature in a sensory bag to explore

Explore the Nature Sensory Bag

I taped the nature sensory bag to our front door that’s a full glass window to make it a suncatcher too! It looked so pretty with the light shining through.

Another project! Make a nature suncatcher.

Louis explored the flowers with his fingers. He tried to move them around a little, squishing it.
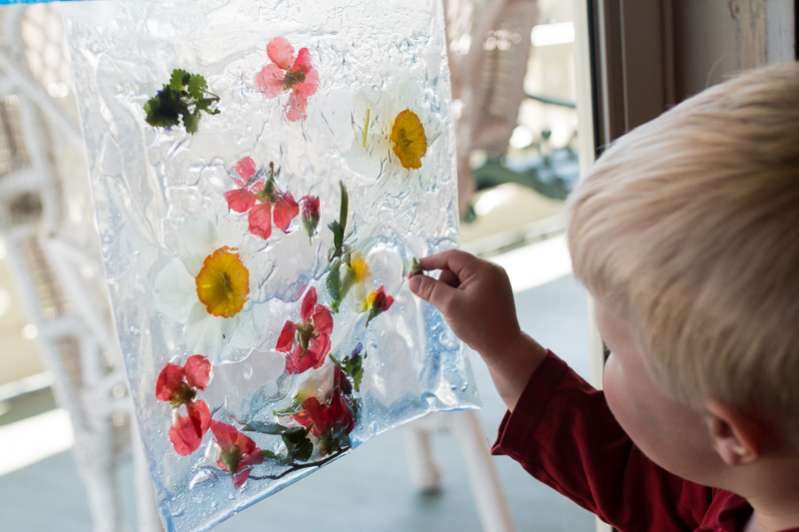
Nature in a sensory bag for toddlers to explore

The older boys were playing outside when they saw Louis in the door with his sensory bag and decided they needed to play with it too!

Louis also thought it was time for him to go outside at the same time because he saw the older boys. So they literally swapped places and then Louis realized he wanted to be inside when he saw them playing with the sensory bag. Oh the fun of a toddler!

You can find a week of simple activities for a 2 year old here!

Henry thought he could spot pairs of flowers and match them together by moving them in the sensory bag. He didn’t have very good luck moving them though, the flowers kept breaking apart (but that leads me to an idea for a puzzle sensory bag sometime!).
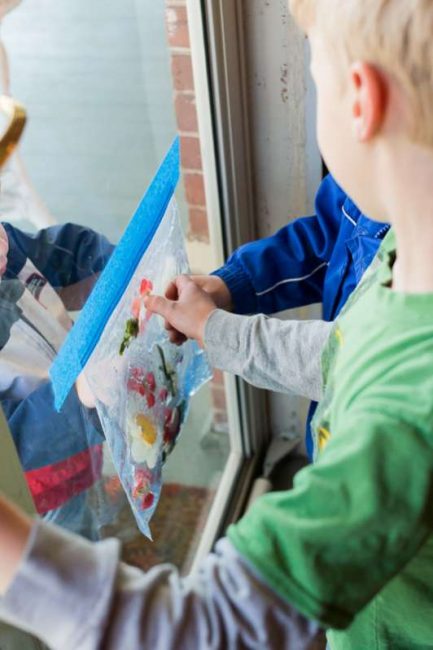
Exploring a nature sensory bag

My one big tip with sensory bags that I failed with this time is to make sure you get all the air out of the baggy.

After putting the flowers in the bag full of gel, I forgot to squeeze it out until later. While Henry was trying to move the flowers around, some started falling to the bottom of the bag as the gel was beginning to settle.

If I had sucked the air out it wouldn’t have happened, at least not as soon as it did.

Here’s another version of our sensory bag:
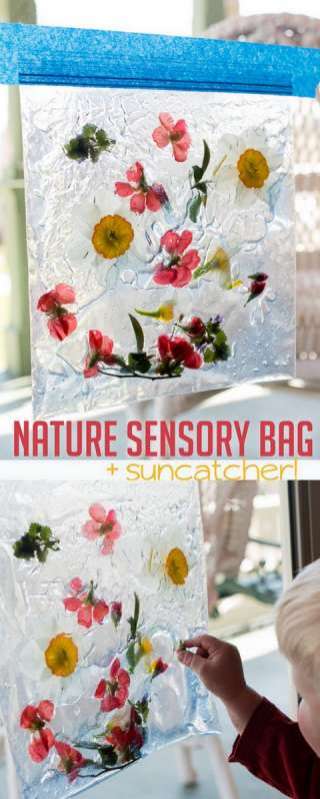
Sensory bags are easy and fast to make, gives the kids something to explore, and they're entertaining for toddlers! This nature sensory bag is no exception.

Nature Sensory Bag Suncatcher


Hands On As We Grow https://ift.tt/2q2a1jj

Click here to read Nature Sensory Bag Suncatcher on Hands On As We Grow


Explore spring, and build a fun suncatcher, when you make a DIY nature sensory bag with your kids!

I love making simple sensory bags for the kids, this nature sensory bag is no exception. They’re easy to make, super fast, and gives the kids something to explore in a fun way. I find them super entertaining for toddlers.

We’ve recently done learning sensory bags for the older boys, making them ‘I Spy’ sensory bags to find letters and math equations (for my first grader).

But my favorite one we’ve done in the past was so simple, just some googly eyes to explore. (It was during the Halloween season).

We needed to explore something for other seasons, right?

This is perfect for Spring with all the little bits of nature peeking up now.

A No-Mess Way for Toddlers to Explore Nature

Here are 48 ways to explore with sensory bags!

Make Your Own DIY Nature Sensory Bag

The boys did their part to help me make this nature sensory bag.

They went outside to collect flowers and leaves (make it a scavenger hunt!) to add to the sensory bag while I added hair gel to a gallon-size baggy.

I buy the cheapest hair gel I can possibly find (affiliate link, this was L.A. Looks which brought back funny memories). This gel was blue in the bottle and I didn’t have a lot left, maybe half a bottle, but it was enough! I love that it didn’t end up looking too blue either.

It took them awhile because we don’t have many flowers yet in our yard, so they had to head to Grandpa’s yard to find gorgeous flowers (he gave them the okay to pick them).

Once the boys got back with their nature finds, I added them to the bag of gel.

I decided on a front side of the sensory bag and tried my best to lay the flowers flat facing that side.

I didn’t double bag it, but you could if you’re worried about holes or it leaking.

Nature in a sensory bag to explore

Explore the Nature Sensory Bag

I taped the nature sensory bag to our front door that’s a full glass window to make it a suncatcher too! It looked so pretty with the light shining through.

Another project! Make a nature suncatcher.

Louis explored the flowers with his fingers. He tried to move them around a little, squishing it.

Nature in a sensory bag for toddlers to explore

The older boys were playing outside when they saw Louis in the door with his sensory bag and decided they needed to play with it too!

Louis also thought it was time for him to go outside at the same time because he saw the older boys. So they literally swapped places and then Louis realized he wanted to be inside when he saw them playing with the sensory bag. Oh the fun of a toddler!

You can find a week of simple activities for a 2 year old here!

Henry thought he could spot pairs of flowers and match them together by moving them in the sensory bag. He didn’t have very good luck moving them though, the flowers kept breaking apart (but that leads me to an idea for a puzzle sensory bag sometime!).

Exploring a nature sensory bag

My one big tip with sensory bags that I failed with this time is to make sure you get all the air out of the baggy.

After putting the flowers in the bag full of gel, I forgot to squeeze it out until later. While Henry was trying to move the flowers around, some started falling to the bottom of the bag as the gel was beginning to settle.

If I had sucked the air out it wouldn’t have happened, at least not as soon as it did.

Here’s another version of our sensory bag:

Sensory bags are easy and fast to make, gives the kids something to explore, and they're entertaining for toddlers! This nature sensory bag is no exception.

Monday, April 2, 2018

Upcycled Number Matching Box


Hands On As We Grow https://ift.tt/2GuiEhO

Click here to read Upcycled Number Matching Box on Hands On As We Grow


Build number recognition and fine motor skills in this DIY number matching box activity from Francis!

We are expecting our 3rd child and each pregnancy has its special characteristic.

This one has been all about sparkling water. I have to control myself not to drink a bottle a day!

With so many bottles around the house, we decided to have some fun with them. The Pop Bottle Bowling activity was easy to setup and a got a lot of giggles out of the kids!

Have even more fun with these plastic bottle activities!

I caught my 2-year-old engaged in screwing the bottle caps on and off and that inspired this number matching box.

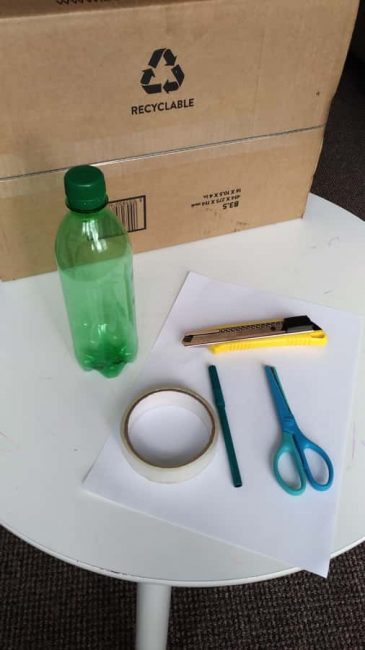
Upcycle pop bottles and a cardboard box to build a DIY number matching box

Number Matching Box Materials:

– Craft knife (for adults only!)
– Scissors
– 10 plastic bottles with caps
– Cardboard box
– Marker
– Sticky tape
– Sheet of paper

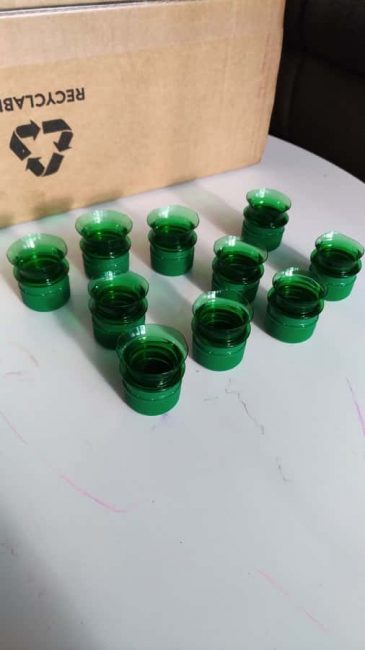
Use bottle tops and caps to build a number matching box

Build Your Number Matching Box:

Using a craft knife, I cut the tops off the bottles and also cut 10 holes on the bottom of my cardboard box.

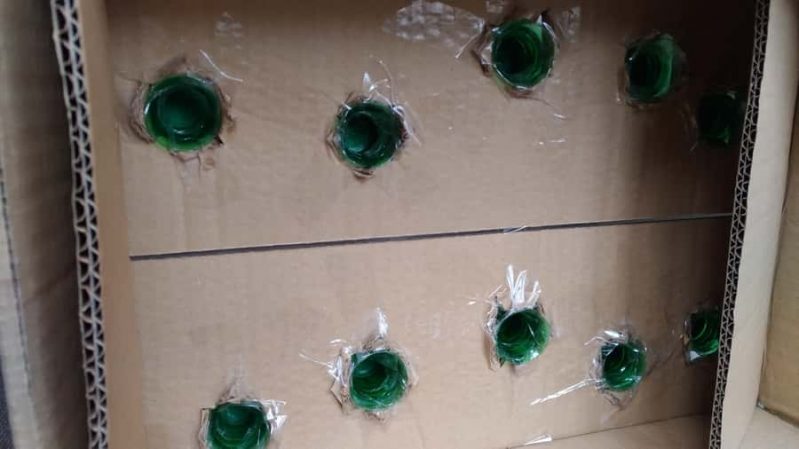
Build your own DIY number matching box

I fit the bottle tops in each hole on the box using sticky tape on the inside to fix them in place.

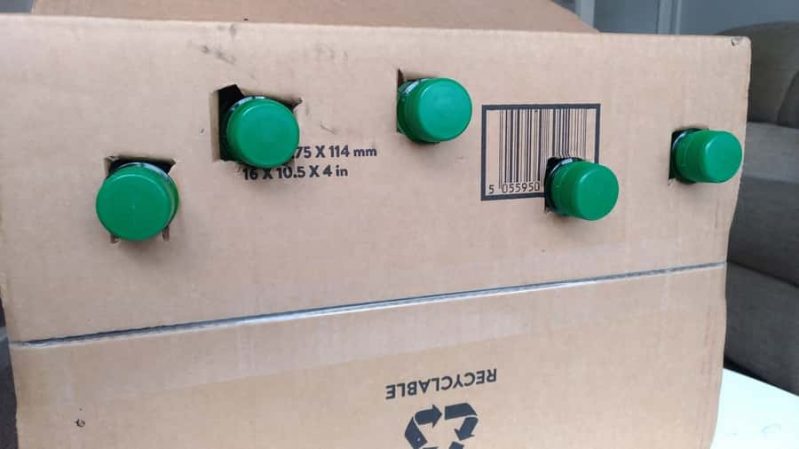
Build your own DIY number matching box

The bottle tops with their caps should be sticking out of the cardboard box.

Practice fine motor skills by cutting

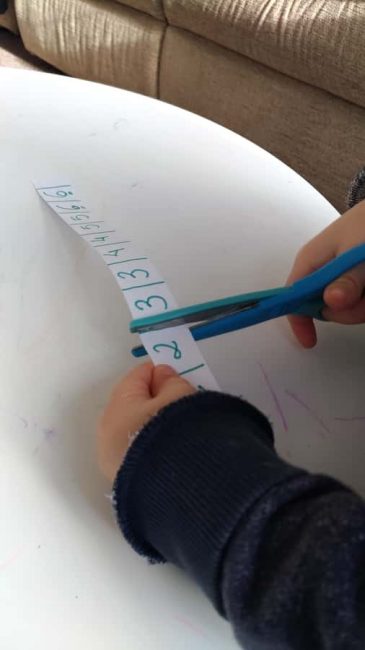
I cut strips of paper and wrote two sets of numbers from 1 to 10. Nathan then cut down the lines I drew between each number, a great way to practice cutting skills!

Build your own DIY number matching box

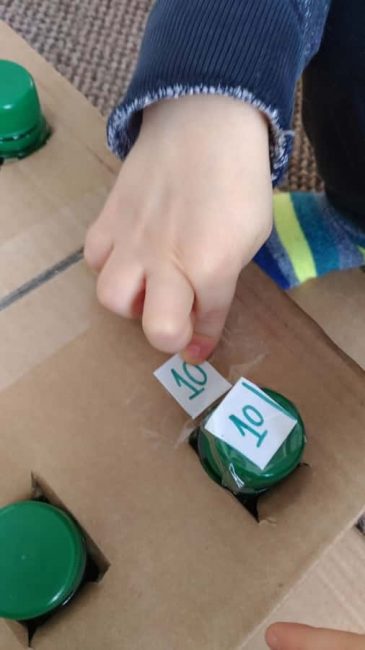
Nathan also helped me cut and peel sticky tape pieces and we stuck them above our bottle tops and on the bottle caps.

Now to play with our DIY number matching box!

Practice number recognition and fine motor skills with a number matching box

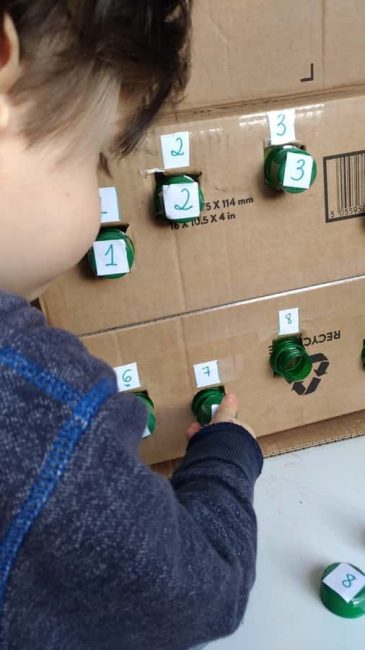
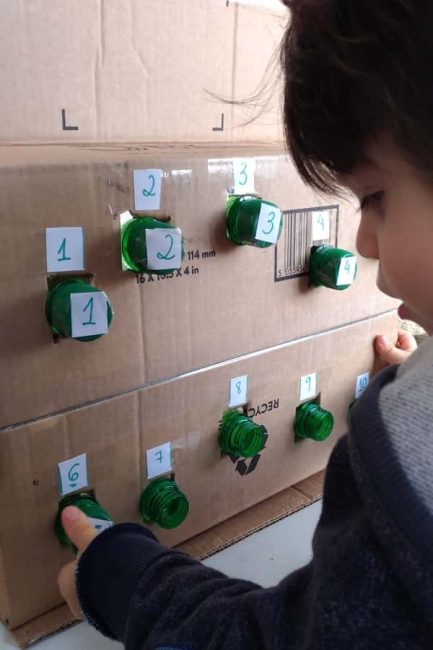
We unscrewed all the caps and Nathan enjoyed finding each matching bottle top on the box.

Twisting the caps is an excellent fine motor skill for future writing.

I didn’t expect him to know the names of the numbers, but was surprised he knew 3, 5, 8 and 10!

Build number recognition with a DIY number matching box

As he was matching the caps, I would call out the numbers so we could practice number recognition. He was able to recognize the 1 and 4!

If your child already knows the numbers from 1-10, you can use the numbers from 11-20. You can even write some simple math equations for the older ones!

Build even more early math skills with these 40 awesome number activities!

What are your kid’s favorite number activities?

Upcycled Number Matching Box


Hands On As We Grow https://ift.tt/2GuiEhO

Click here to read Upcycled Number Matching Box on Hands On As We Grow


Build number recognition and fine motor skills in this DIY number matching box activity from Francis!

We are expecting our 3rd child and each pregnancy has its special characteristic.

This one has been all about sparkling water. I have to control myself not to drink a bottle a day!

With so many bottles around the house, we decided to have some fun with them. The Pop Bottle Bowling activity was easy to setup and a got a lot of giggles out of the kids!

Have even more fun with these plastic bottle activities!

I caught my 2-year-old engaged in screwing the bottle caps on and off and that inspired this number matching box.

Upcycle pop bottles and a cardboard box to build a DIY number matching box

Number Matching Box Materials:

– Craft knife (for adults only!)
– Scissors
– 10 plastic bottles with caps
– Cardboard box
– Marker
– Sticky tape
– Sheet of paper

Use bottle tops and caps to build a number matching box

Build Your Number Matching Box:

Using a craft knife, I cut the tops off the bottles and also cut 10 holes on the bottom of my cardboard box.

Build your own DIY number matching box

I fit the bottle tops in each hole on the box using sticky tape on the inside to fix them in place.

Build your own DIY number matching box

The bottle tops with their caps should be sticking out of the cardboard box.

Practice fine motor skills by cutting

I cut strips of paper and wrote two sets of numbers from 1 to 10. Nathan then cut down the lines I drew between each number, a great way to practice cutting skills!

Build your own DIY number matching box

Nathan also helped me cut and peel sticky tape pieces and we stuck them above our bottle tops and on the bottle caps.

Now to play with our DIY number matching box!

Practice number recognition and fine motor skills with a number matching box

We unscrewed all the caps and Nathan enjoyed finding each matching bottle top on the box.

Twisting the caps is an excellent fine motor skill for future writing.

I didn’t expect him to know the names of the numbers, but was surprised he knew 3, 5, 8 and 10!

Build number recognition with a DIY number matching box

As he was matching the caps, I would call out the numbers so we could practice number recognition. He was able to recognize the 1 and 4!

If your child already knows the numbers from 1-10, you can use the numbers from 11-20. You can even write some simple math equations for the older ones!

Build even more early math skills with these 40 awesome number activities!

What are your kid’s favorite number activities?

Friday, March 30, 2018

Rain


A to Z Kids Stuff-Educational ideas and activities for young children https://ift.tt/2H3oRON

Rain theme for preschool and kindergarten children.


Rain theme for young children

Tuesday, March 27, 2018

Matching Upper and Lowercase Letters on ABC Road


Hands On As We Grow https://ift.tt/2A3rA6z

Click here to read Matching Upper and Lowercase Letters on ABC Road on Hands On As We Grow


Help your child learn their ABCs by matching upper and lowercase letters.

I’ve found that matching upper and lowercase letters is a great way to reinforce learning letters for preschoolers. Of course, making it fun is really what works!

We did just that using our ABC mat (affiliate link if you’re interested). A toy I completely forgot about.

Do you ever forget you have certain toys? You put them away, thinking you’ll rotate them in or something, but then never do?

Our ABC mat is one of those toys. It’s one I don’t want out all the time because the boys just get all the pieces out and they’re strewn about the house for days and days.

So I put it away, back in the closet, so they wouldn’t see it and drag it out.

I forgot what a great learning tool it could be though! I forgot about it altogether.

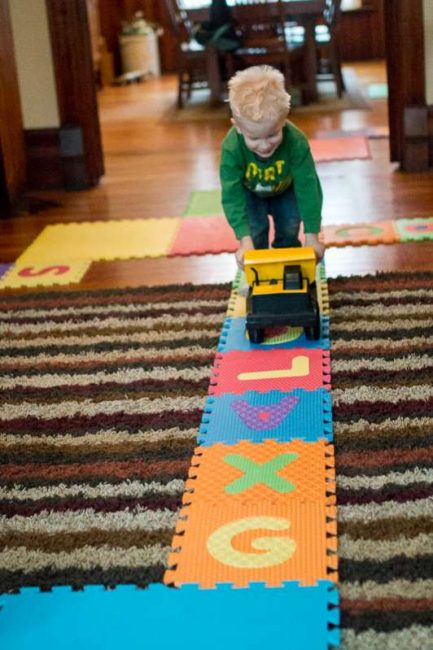
When the boys were outside sledding with Dad, I snuck it out and set up an ABC road to work on matching upper and lowercase letters.

Find more Move & Learn Activities like this!

An active way to practice matching upper and lowercase letters

George came in first, which was perfect! This letter learning activity was perfect for him to practice lowercase letters.

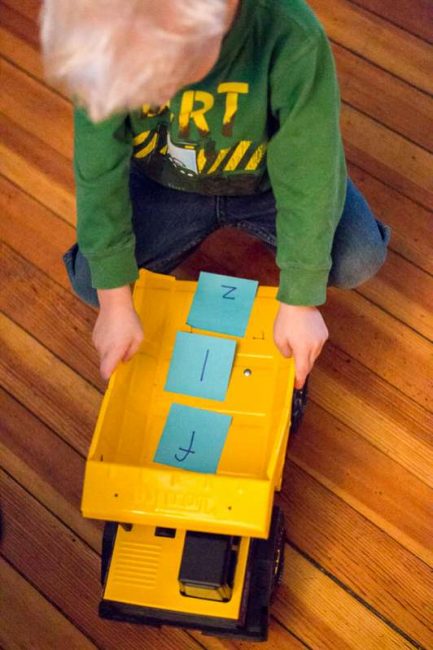
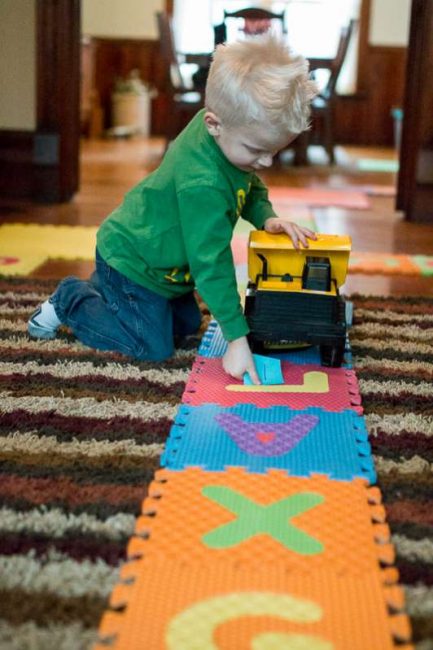
As I wrote lowercase letters of the alphabet on sticky notes, George found his vehicle of choice, a dump truck.

I “loaded” his dump truck with 3 or 4 lowercase letters at a time.

As I loaded it, I asked George what the letters were. We’re still working on many of the lowercase letters. If he needed help, this is when I’d tell him what they were.

A load full of lowercase letters to match to uppercase counterparts

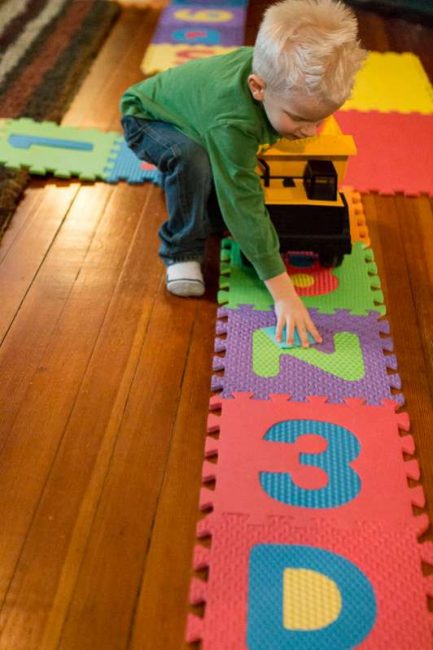
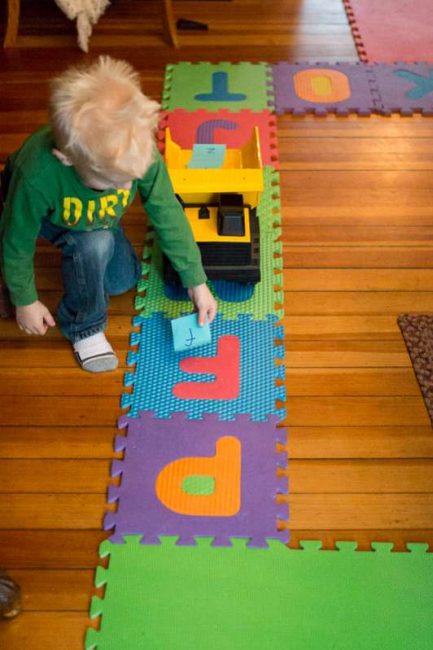
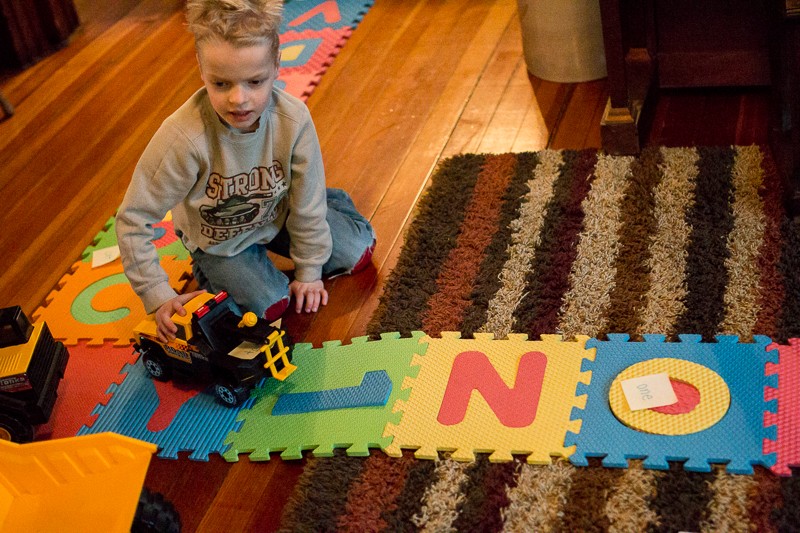
Then he was off to find the matching uppercase letter on the ABC road and stick the lowercase letter to it.

The goal was to fill all the ABC road with its matching lowercase counterparts.

Finding and matching upper and lowercase letters - and getting them moving

I purposefully didn’t make the road go around our loop in the house. I didn’t want it to get out of control as my kids often do.

It was time for me to start preparing dinner, so I set the road up so it didn’t go through the kitchen or by the dining room table.

Finding and matching upper and lowercase letters - and getting them moving

After George found the three matching letters, he’d come back to me to give him another load of letters.

There was some confusion at times. For instance, when matching the upper and lowercase letters like L – the lowercase is ‘l’ which looks like the uppercase ‘I’, so I had to clarify. Same with the M and W. No biggie.

Finding the matching upper and the lowercase letters

Then Henry joined us and immediately wanted to do the activity too!

Well, Henry’s in first grade and matching upper and lowercase letters is a little behind him.

I kicked it up a notch and used words.

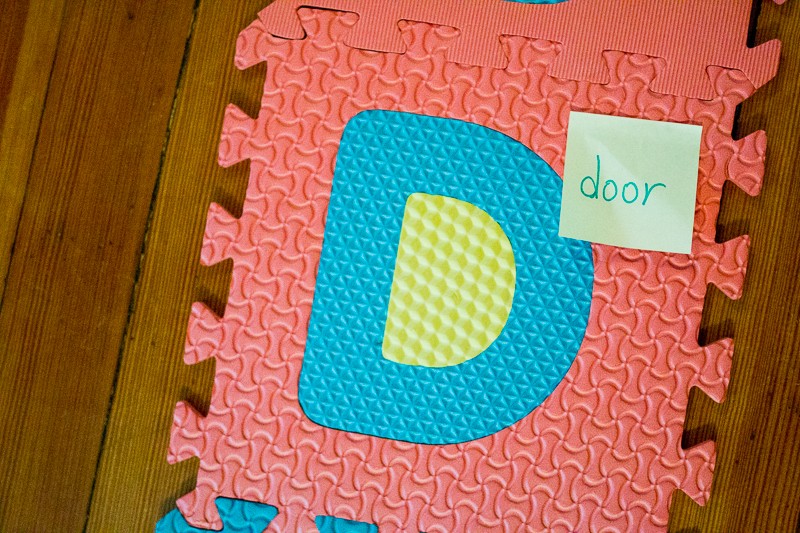
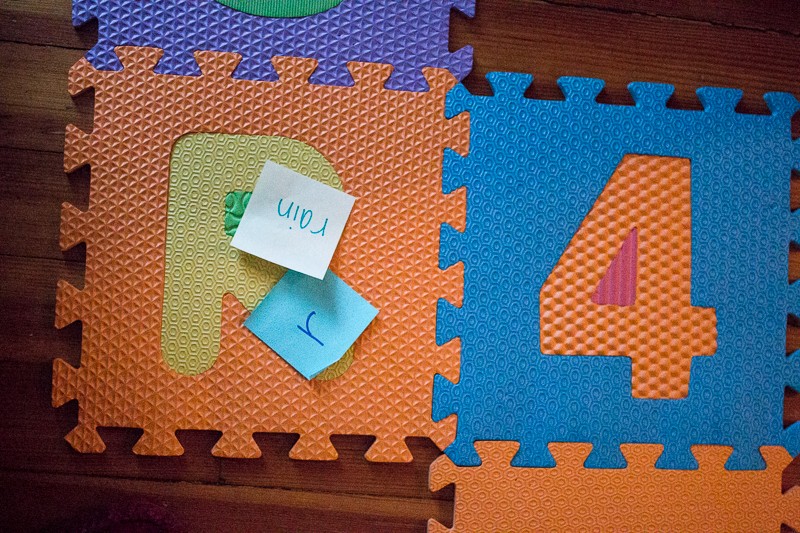
I wrote a word on the sticky note that began with each letter.

Still not the toughest of tasks for him. But he did have to read the word to me before finding what letter it goes on.

Instead of matching upper and lowercase letters, make it harder to match beginning letters of words

I wish I could have come up with harder words for him.

I just didn’t take a lot of time to plan that part out.

Instead of matching upper and lowercase letters, make it harder to match beginning letters of words

The boys were done with their learning after they got through their letters.

They then raced their trucks around the road until it was time for dinner.

If they had wanted to continue, I had numbers ready for George as well.

And Henry would have had subtraction problems to equal each number 0-9.

Both matching upper and lowercase letters and beginning letters of words

We’ve been working on matching upper and lowercase letters a lot (and for quite a while!):

Matching Upper and Lowercase Letters on ABC Road


Hands On As We Grow https://ift.tt/2A3rA6z

Click here to read Matching Upper and Lowercase Letters on ABC Road on Hands On As We Grow


Help your child learn their ABCs by matching upper and lowercase letters.

I’ve found that matching upper and lowercase letters is a great way to reinforce learning letters for preschoolers. Of course, making it fun is really what works!

We did just that using our ABC mat (affiliate link if you’re interested). A toy I completely forgot about.

Do you ever forget you have certain toys? You put them away, thinking you’ll rotate them in or something, but then never do?

Our ABC mat is one of those toys. It’s one I don’t want out all the time because the boys just get all the pieces out and they’re strewn about the house for days and days.

So I put it away, back in the closet, so they wouldn’t see it and drag it out.

I forgot what a great learning tool it could be though! I forgot about it altogether.

When the boys were outside sledding with Dad, I snuck it out and set up an ABC road to work on matching upper and lowercase letters.

Find more Move & Learn Activities like this!

An active way to practice matching upper and lowercase letters

George came in first, which was perfect! This letter learning activity was perfect for him to practice lowercase letters.

As I wrote lowercase letters of the alphabet on sticky notes, George found his vehicle of choice, a dump truck.

I “loaded” his dump truck with 3 or 4 lowercase letters at a time.

As I loaded it, I asked George what the letters were. We’re still working on many of the lowercase letters. If he needed help, this is when I’d tell him what they were.

A load full of lowercase letters to match to uppercase counterparts

Then he was off to find the matching uppercase letter on the ABC road and stick the lowercase letter to it.

The goal was to fill all the ABC road with its matching lowercase counterparts.

Finding and matching upper and lowercase letters - and getting them moving

I purposefully didn’t make the road go around our loop in the house. I didn’t want it to get out of control as my kids often do.

It was time for me to start preparing dinner, so I set the road up so it didn’t go through the kitchen or by the dining room table.

Finding and matching upper and lowercase letters - and getting them moving

After George found the three matching letters, he’d come back to me to give him another load of letters.

There was some confusion at times. For instance, when matching the upper and lowercase letters like L – the lowercase is ‘l’ which looks like the uppercase ‘I’, so I had to clarify. Same with the M and W. No biggie.

Finding the matching upper and the lowercase letters

Then Henry joined us and immediately wanted to do the activity too!

Well, Henry’s in first grade and matching upper and lowercase letters is a little behind him.

I kicked it up a notch and used words.

I wrote a word on the sticky note that began with each letter.

Still not the toughest of tasks for him. But he did have to read the word to me before finding what letter it goes on.

Instead of matching upper and lowercase letters, make it harder to match beginning letters of words

I wish I could have come up with harder words for him.

I just didn’t take a lot of time to plan that part out.

Instead of matching upper and lowercase letters, make it harder to match beginning letters of words

The boys were done with their learning after they got through their letters.

They then raced their trucks around the road until it was time for dinner.

If they had wanted to continue, I had numbers ready for George as well.

And Henry would have had subtraction problems to equal each number 0-9.

Both matching upper and lowercase letters and beginning letters of words

We’ve been working on matching upper and lowercase letters a lot (and for quite a while!):