
Click here to read DIY Phenology Wheel for a Simple Preschool Nature Study on Hands On As We Grow®
Combine nature and art with a super fun and easy artistic nature study from Alisha. Learn how to make a DIY phenology wheel for preschoolers!
Do you have a child who loves the outdoors? Or a child who loves creating art?
This coloring fun nature exploration activity creates a simple foundation for year-long nature study with just one activity.
Explore more outside with these 23 exciting nature activities!
I love small learning projects that keep going over time. Just a few minutes a day or every so often can lead to huge leaps in understanding!
This fun artistic twist on a nature study is exactly that kind of low-maintenance learning project. Work on it once a month or so to learn how your outside world changes over the year.
DIY Phenology Wheel for a Simple Preschool Nature Study
Your DIY Phenology Wheel nature study can be started at any time during the year.
Just keep it somewhere safe. Take it out each month for a fun artistic expression of the natural world around us.
Adults can definitely join in the fun as well with their own Phenology Wheel. I did!
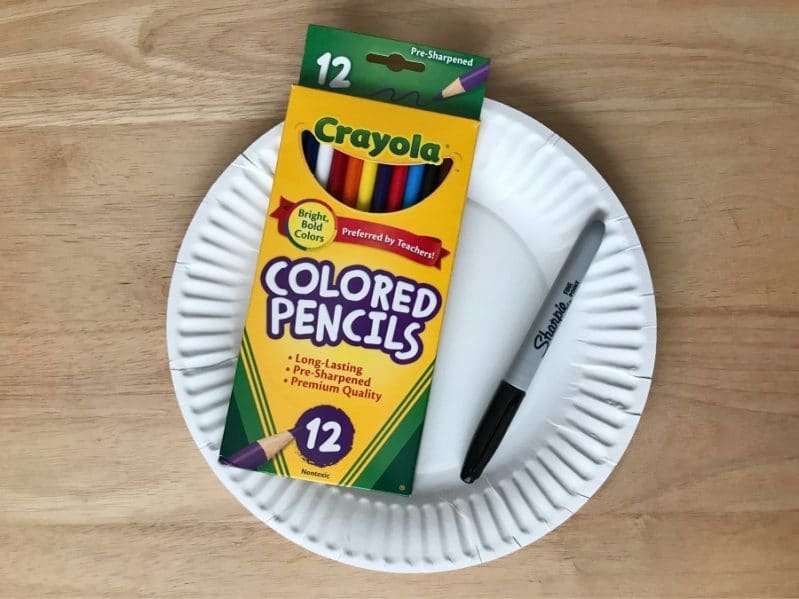
For our DIY Phenology Wheels, we needed:
- A paper plate
- A marker
- Colored pencils or crayons
- Nature
- Ruler
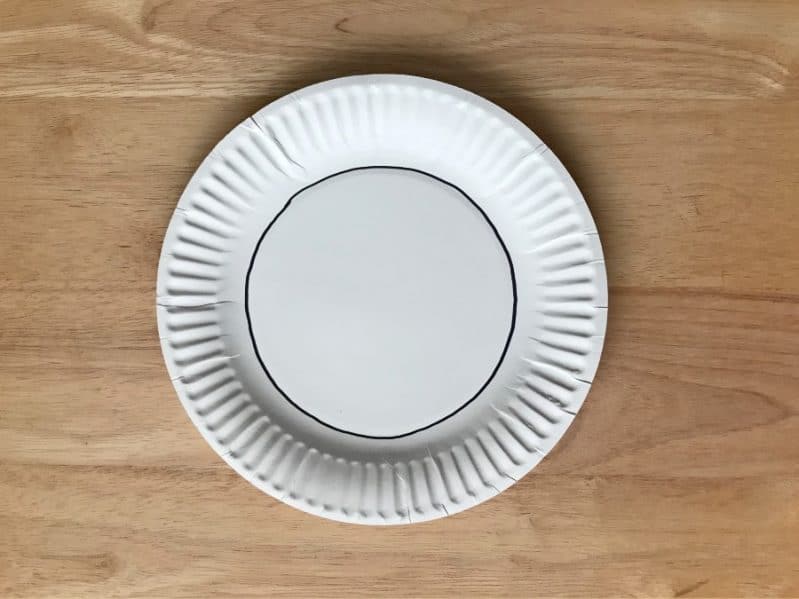
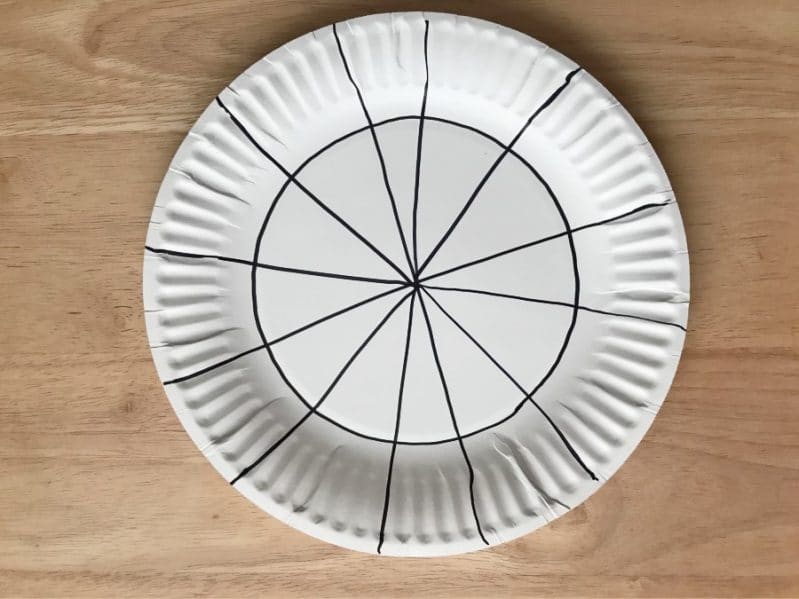
Begin by tracing the inner circle of the paper plate with the marker.
If you don’t have a paper plate, use cardboard or sturdy paper like card stock or construction paper.
Draw a plate-sized circle. Then draw a slightly smaller circle inside your big circle.
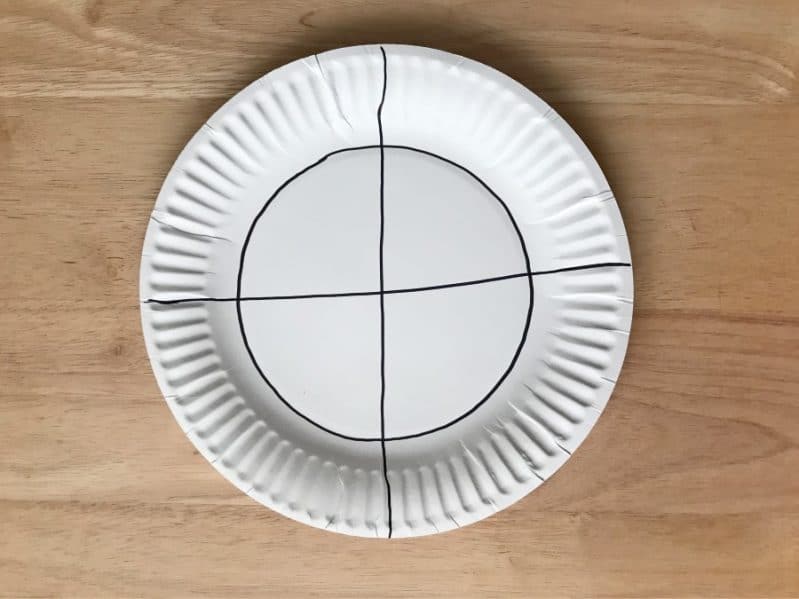
Once you have your circle drawn, divide the plate into four quarters by drawing a horizontal line and a vertical line across the plate.
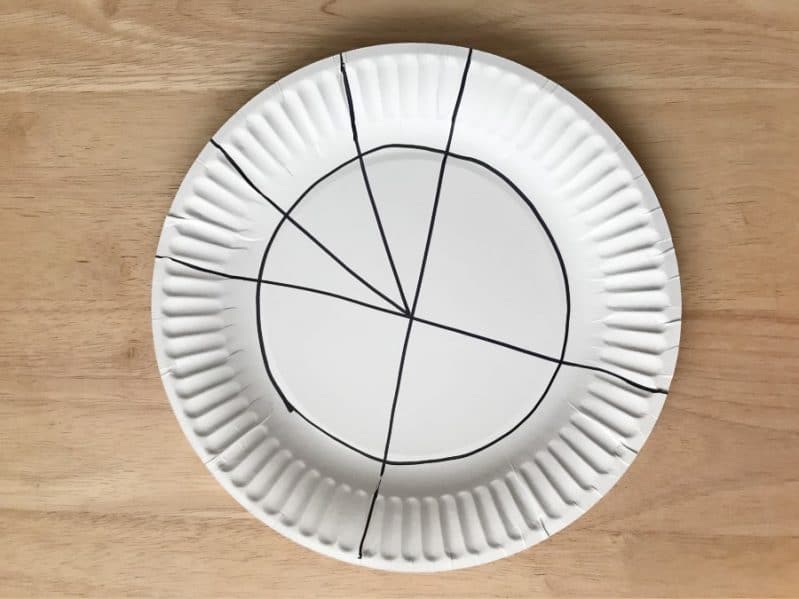
The trickiest part is to then divide each quarter into three equal triangles. To divide each quarter, draw two diagonal lines in each quarter/section from the center point.
If you’d like, use a ruler to help you get the lines straight and even. But don’t stress over neatness!
Continue drawing two lines from the center for each of the four sections, until you have twelve triangles.
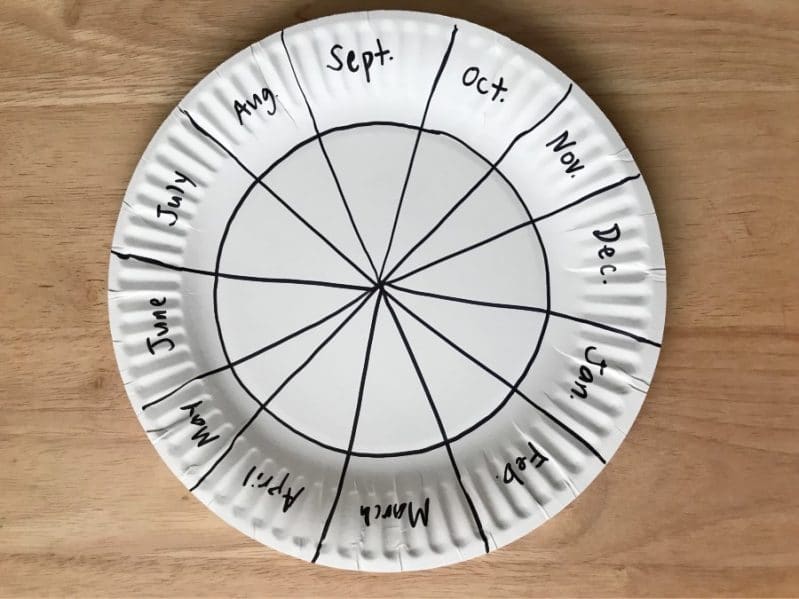
Now that your Phenology Wheel is divided into twelve equal sections, it’s time to label the months of the year.
This is a great opportunity to review the months of the year with your child and work on calendar skills. You could even start talking about division and higher level math skills.
Boost those early kindergarten skills with fun learning activities!
Label your plate with the months of the year. Use the blank space between the inner circle and the edge of the plate.
You could use abbreviations for the months or spell out the whole word. Either way, it’s a great learning opportunity!
After you’ve labeled everything, move your plate so that your starting month is at the top. We started with September, so it’s at the top of our wheel.
Starting Your DIY Phenology Wheel
Your nature exploration tool is now ready to use!
Grab your coloring tools (we used colored pencils) and head out into nature.
Gather together and focus your nature observation eyes as you look together at the colors all around. The trees, sky, ground, water, hills, etc…
Encourage your child to talk about what they see and discuss together as you observe.
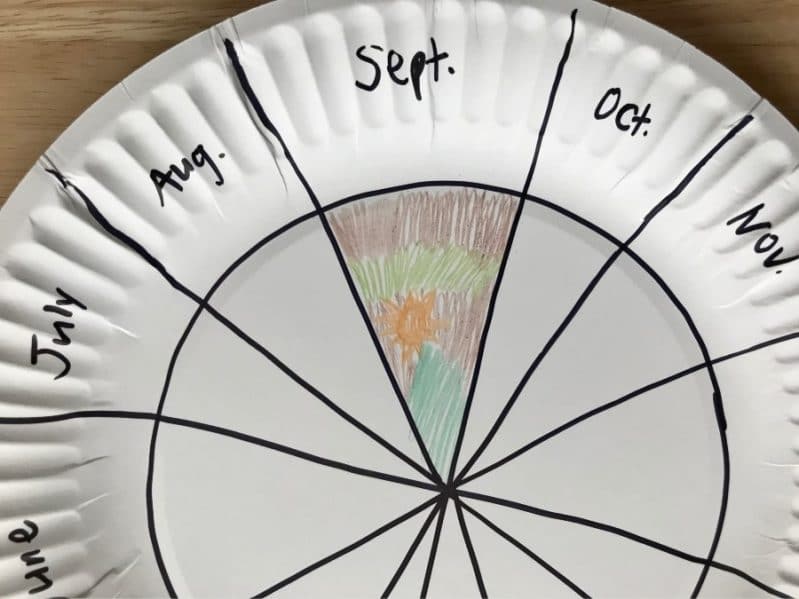
Then grab your Phenology Wheel and color in the triangle for that month using the colors you have observed.
For example, we observed green leaves, brown trees, and orange sunshine. So we used these three colors to fill-in our September section.
As a variation to just using colors, you can draw pictures of what you saw as well.
Once your colors are recorded, enjoy some time being outdoors by trying out some of these simple outdoor activities.
Place your Phenology Wheel in your nature bag, hang it in the window, or place in a drawer by the door to use each month.
If monthly nature observation is too much, you could choose to record by season instead. Just leave your Phenology Wheel as four big sections.
Or you could get super detailed and divide each month into four or five weeks. Then color in a tiny slice of your wheel every week.
We are excited to head back out in October to keep working on our DIY Phenology Wheel. We’ll go back to the same exact spot to keep everything as consistent as possible.
If you wanted to mix things up, you can go to any natural area. Check out several nature spots each month or pick somewhere different every time.
No time to head outside? Take a peek out the window instead!
The goal is to connect to nature by really looking at the colors outside and tracking them over time.
My family loves this fun and easy way to combine our love of nature with our creative side!

No comments:
Post a Comment