
Click here to read Make Your Own Simple Thankful Chain for Thanksgiving on Hands On As We Grow®
What are you thankful for? Use this thankful chain idea, from Brigitte, to count your blessings for Thanksgiving!
It’s a tradition for our family to create a thankful tree and a thankful chain each year for Thanksgiving.
Not only does a thankful chain encourage us to be thankful, but this simple craft can also promote many skills such as cutting practice, writing practice, color sorting, and pattern making.
Make Your Own Simple Thankful Chain for Thanksgiving
For our thankful chain, we used:
- construction paper – red, yellow, and orange
- ruler
- pen
- scissors
- stapler or tape
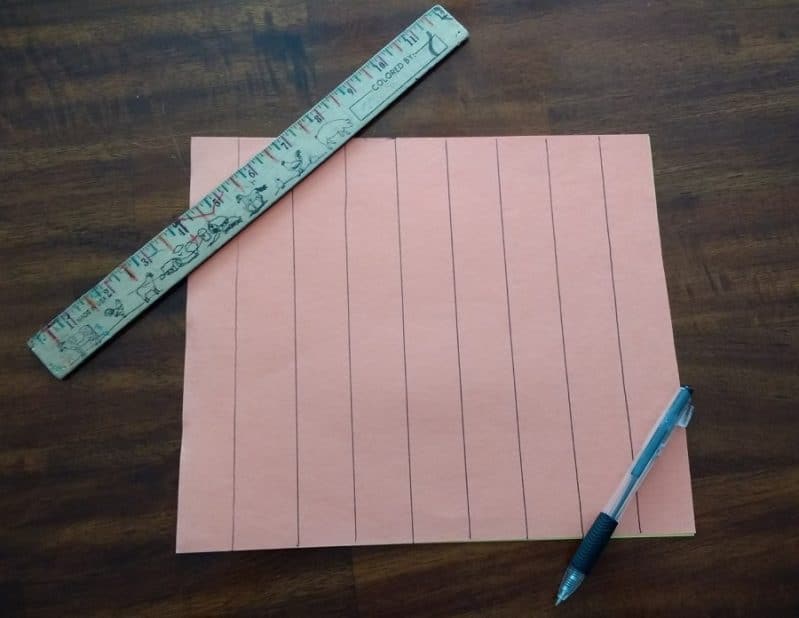
To begin creating our thankful chain, I trace lines on to various colored pieces of construction paper using a ruler and a pen.
I often use red, orange, and yellow construction paper to match the colors of fall leaves. But you can use any colors that your family likes.
Next, my daughters cut on the lines to create multiple strips of paper. This makes great cutting practice and works on fine motor skills, too.

Then, they write what they are thankful for on one side of each strip. When they were younger, I would write the words as they told me them.
If your children want, they could draw a small picture on their strips to show what they are thankful for.

Use your chain to spark conversation with thankful conversation starters.
Next, my daughters sort the strips by color. This part of the activity doubles as color matching practice!

Having the strips sorted by color makes it easier for them to create a color pattern with the strips. We decided to do red, orange, yellow as a repeating pattern the last time we did this project.
As my daughters hand me the strips of paper, I staple them together one at a time to make the chain.
Make a loop or ring with the first paper strip by bending the paper until the ends touch. Then staple them together.
For the rest of the rings, pass the colored paper through the last link you made. Then bend the paper into a loop and staple the ends.
If you don’t have staples on hand, you could also use tape.

You can decide as a family how to grow your chain.
Will you make a big long chain all at once? Or will you add a few links every day or every week?
It’s totally up to you!
Throughout November, we’ll keep adding links to our thankful chain.
It can be fun to measure the chain when completed and as it grows. Is it taller or shorter than each of us?
We always hang the chain somewhere around our house to display the things we are thankful for. It makes a great autumn and Thanksgiving themed decoration.

No comments:
Post a Comment