

This Portable Binder Doll House is the perfect solution for small spaces!
My kids love making and decorating their very own doll house and I love that it is compact so it takes up very little space. This DIY doll house stores easily on a bookshelf.
In this binder doll house tutorial, I’m going to show you how to make a bedroom, but other ideas are a kitchen, bathroom, living room, veterinary office, classroom, etc.
Your only limit is your imagination!
When you’re finished with this project, head on over and get inspired on how to make DIY Dollhouse Furniture.
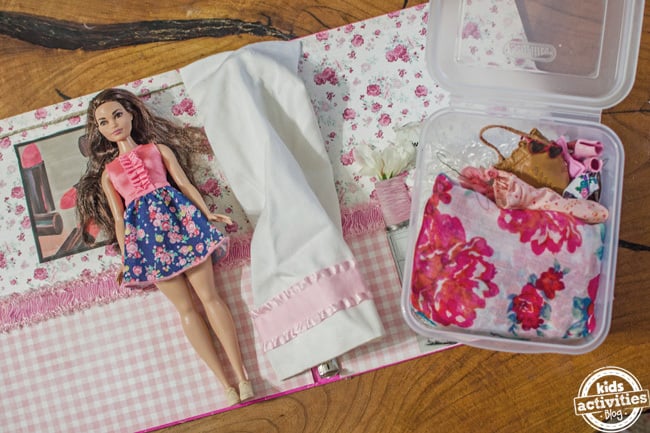
I *so wish* I could have had one of these kinds of doll houses when I was a kid! You only need a few supplies to make a Portable Binder Doll House, and you probably have most of the supplies at home already. This homemade doll house would make a cute homemade Christmas or birthday gift. You can even take the binder doll house with you when traveling (we store our accessories in a small storage container, but a gallon size freezer bag works great too).


Portable Binder Doll House
Supplies needed: (affiliate links)
- 1 inch regular size binder with rings
- Scrapbook paper or other decorative paper
- Hot glue and hot glue gun
- About 2 feet of ribbon
- Piece of fabric, about 12 inches long by 6 inches wide
- Old furniture and decorating magazines (I used an old IKEA catalog and a Better Homes & Gardens magazine)
- Other bits of crafting materials for decoration, for example twine: wire, silk flowers, buttons, etc
Directions:
The first thing you are going to want to do is measure your scrapbook paper to cover the inside of your binder. These will become the “walls” of the doll house. Carefully cut and secure with hot glue. I used a strip of pretty ribbon to decorate the walls and also secured it with hot glue.

Next, you’ll want to cover the 3 metal rings with the piece of fabric to look like curtains. Fold the top of the “curtain” over and adhered with hot glue. Then fold the sides together and secure just at the top with hot glue. Then attach the top of the curtain to the the top ring tab and top edge of the binder (wall) with more hot glue.

Now comes the fun part–decorating your binder doll house! I simply chose bedroom accessories out of my IKEA catalog and magazine to decorate the room. Then, I hung a picture on the wall and added a dresser with a lounging chair. I also placed a vase and lamp on the dresser and put a silk flower in the vase. Also, I added a “clothing rod” made out of a piece of twine. Use glue sticks and hot glue to adhere everything.
Finally, when your child is done playing they can just put it up on the bookshelf to store.

Ok, I’m going to be honest–this Portable Binder Doll House was so much fun to make and I love the finished project so much that I almost don’t want to give it to my daughter. Almost!
This binder doll house is going to make playtime and road trips so much more enjoyable.

Leave a comment: Do you plan on making this fun DIY portable dollhouse?
The post Portable Binder Doll House appeared first on Kids Activities Blog.
No comments:
Post a Comment